
Drupal Commerce – Sell Electronic Products

Drupal Commerce is a comprehensive tool for selling physical products over the Internet. In this post, we will show you how to set up a store with little effort, in order to sell electronic products, or more precisely – to sell access to any files. In addition to Commerce, I will use the Group module to achieve the goal.
In the previous post on building a shop in Drupal we showed how to configure the Commerce module to start selling various types of physical products.
We will take a further step now – I will show you how to configure the system to sell electronic products, such as e-books, music or any other files, using Commerce in Drupal.
This goal can be achieved in several ways, and one of them is the combination of the power of Commerce and the Group module.
Why this method?
- Not much coding,
- authorisations handled by the system and the Group module,
- you sell access to a private group in which the client sees its content,
- simple way to expand the system for selling, e.g. video courses consisting of many parts,
- files are being uploaded via the upload field, attached to the content type,
- product contains a simple reference (field) to the group to which it is to be available after paying.
How does it work for the admin?
- You sell access to the group where the files for downloading are available.
- You add a private file to the content associated with the group.
- You create a product (Commerce) and provide the selected group as a reference.
How does it work for the client?
- Product added to the cart.
- Creating an account for the client during the purchase process. This must be set in the Commerce configuration. Having an account is necessary to assign the client to the group where files to which they are to receive access after a successful payment are added.
- Redirection to payment.
- After the payment is completed, access to the group is granted. Adding the client to the group works automatically and is carried out by an additional code that must be added.
- The user is redirected to the profile where they have access to files and groups.
Configuration
install the Commerce and Group modules along with dependencies.
Group
In addition to the Group module itself, enable the Group Node module (it is part of the Group module) – thanks to it you will be able to determine which type of content will be associated with a given group.
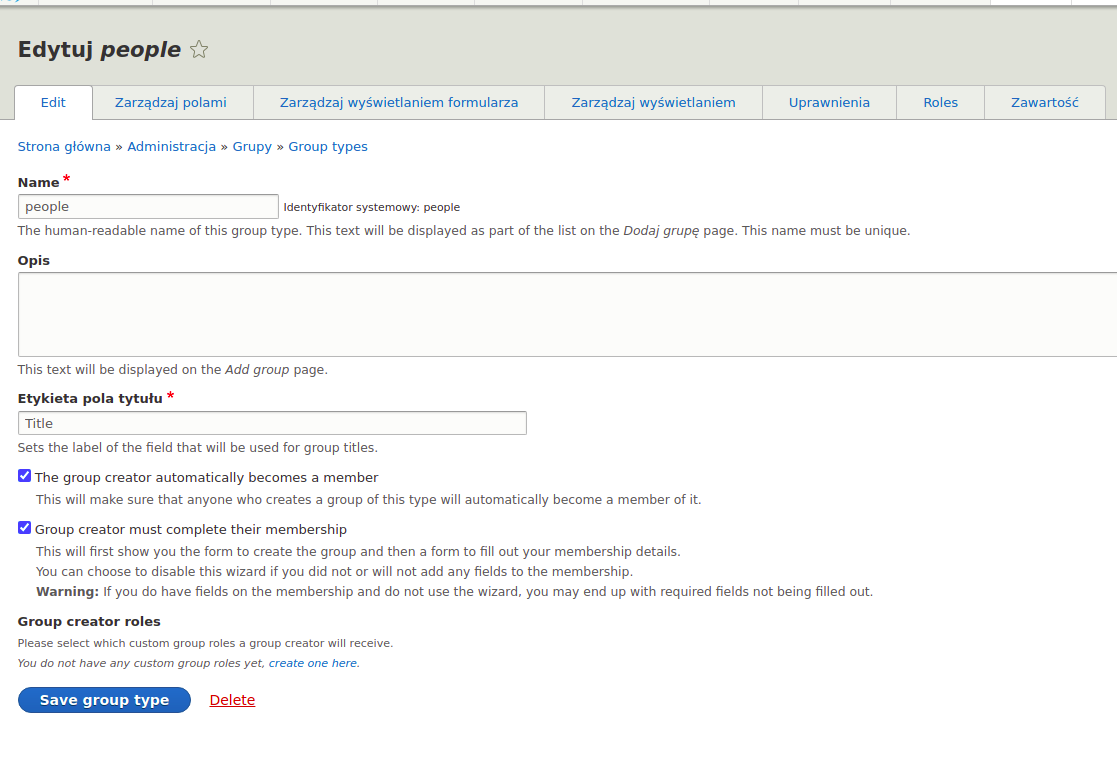
Add the group type – the admin/group/types subpage
At this stage, in the type edition, you can add fields, set its permissions, roles and define the type of content associated with the group.
Add the new group – the admin/group subpage
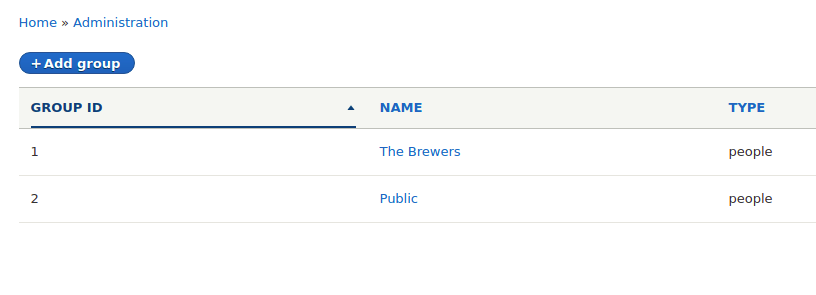
If only one group type is created, then every group being created will be of that type. If there are more, select which type it should belong to when adding the group.
On the admin/structure/types page, add the kind of content to be used as the content type in the group.
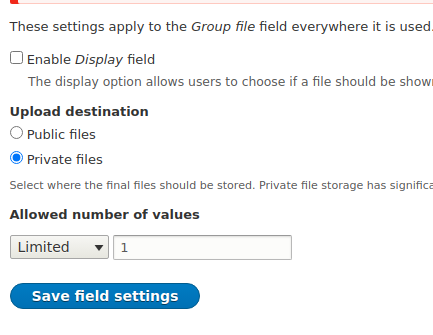
Add a private file field to it.
Make sure you have a properly configured private file system in your Drupal. Next, in the field configuration, set the file to be kept as private, thanks to which it will not be visible to non-authorised people.
Create a content type related to the group.
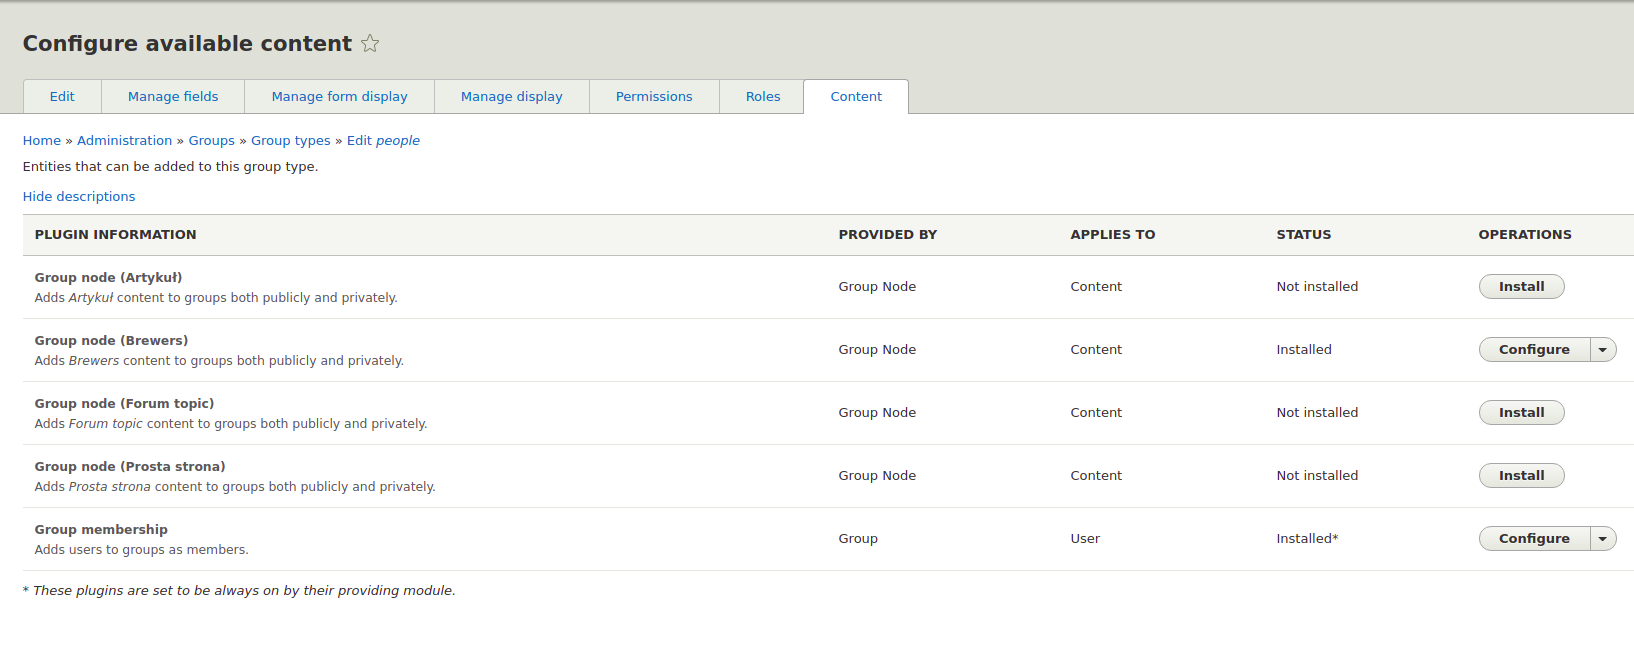
The admin/group/types / manage/GROUPTYPENAME/content page lists the types of content that you can associate with a given group type.
You can do this using the Install button
Thanks to this, it will be possible to create the content intended only for the members of a given group. Thus, each file connected to the content will also be available for viewing only by the people in the group.
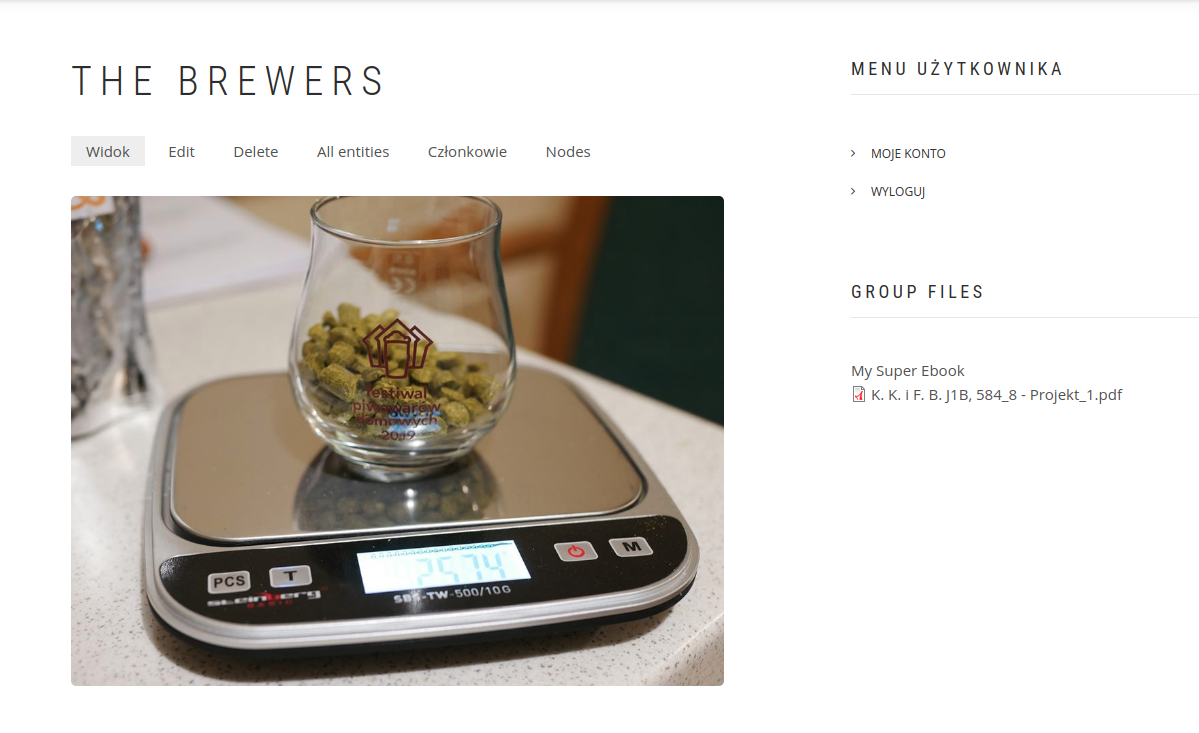
Add content with the file to the group
Edit the group and go to the Nodes tab
Here you can add to the group the existing content or create a new one.
When creating a new entry, add a file to it. Now you can test if in fact, only the members of the group have access to the file.
Commerce
Add a new product type that will be used to sell electronic products. A detailed description of how to do this can be found in the previous section concerning the Commerce configuration.
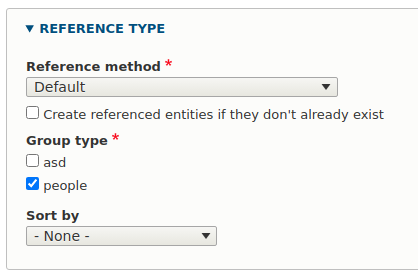
In the product type, add a new field that will be a reference to the created group.
Field type: Reference -> Other…
Position type: Group
The field can be single- or multi-valued.
In the field settings, check the types of groups to which the reference should apply.
In Commerce, you should have at least one payment method configured.
It is after a successful purchase process, and when the order status becomes "completed", that the membership to the selected group will be granted.
Code
The main functionality that is assigning the client to the selected group with the file is carried out using the PHP code, which you have to write yourself, e.g. in a new module.
The example of such a code that assigns the client to the groups from the reference field is built using EventSubscriber, because your system should monitor and react only when the order is paid.
The solution I used
I have created a new commerce_groups module
A service has been added to the module – the file commerce_groups.services.yml
services:
  commerce_groups:
    class: '\Drupal\commerce_groups\EventSubscriber\AttachUserToGroup'
    arguments: ['@entity_type.manager']
    tags:
      - { name: 'event_subscriber' }
The service is defined in the AttachUserToGroup class
One argument was added – entity_type.manager, because I needed to inject it as a dependency in the object constructor (Dependency Injection)
The event_subscriber tag informs Drupal that the class wants to log events triggered by other modules.
The event we want to register is defined in the getSubscribedEvents method in the AttachUserToGroup class, inheriting from EventSubscriberInterface
static function getSubscribedEvents() {
  $events['commerce_order.place.post_transition'] = ['orderCompleteHandler'];

  return $events;
}
commerce_order.place.post_transition is an event triggered after successful payment for the product.
orderCompleteHandler is a method that contains all the logic of what is to happen when a given event occurs.
Below is an example of a working code that, after a successful transaction, assigns the client to all groups from the field_group_ref reference field.
 /**
     * Add customer to group.
     *
     * @param WorkflowTransitionEvent $event
     * @throws \Drupal\Core\Entity\EntityStorageException
     */
    public function orderCompleteHandler(WorkflowTransitionEvent $event) {
      /** @var \Drupal\commerce_order\Entity\OrderInterface $order */
      $order = $event->getEntity();
      $uid_value = $order->get('uid')->getValue();

      $gids = [];
      foreach ($order->getItems() as $order_item) {
        /** @var \Drupal\commerce_product\Entity\ProductVariation $product_variation */
        $product_variation = $order_item->getPurchasedEntity();
        $product = $product_variation->getProduct();
        $group_value = $product->get('field_group_ref')->getValue();
        foreach ($group_value as $group) {
          $gids[] = $group['target_id'];
        }
      }

      /** @var \Drupal\user\Entity\User $account */
      $account = User::load($uid_value[0]['target_id']);

      foreach ($gids as $gid) {
        /** @var \Drupal\group\Entity\Group $group */
        $group = Group::load($gid);
        if ($group) {
          $group->addMember($account);
          $group->save();
        }
      }
    }
Displaying files in the group.
The quickest method is to create a view that on the main page of the group will display all the added files in the content related to the group.
Summary
Commerce and Group are two large, actively supported modules that, when combined, show the true power of Drupal. In an easy way, with a minimal amount of coding, you are able to build a complex and expandable system for selling both physical and electronic products. Both modules will be available in Drupal 9 – the latest version of the system.