Website layout regression tests using docker-console

Has it ever happened to you that when you were looking on a website, you weren’t sure whether a font you used was 12 pt or 13 pt? Or maybe you kept looking at an image, wondering whether it had been moved slightly to the left before? If the layout is a priority on your website, maybe it’s time to think about automating the testing of this aspect of your project. VisualCeption is a noteworthy solution for exactly this use case. In Droptica we use it a lot to ensure that the corporate websites we build for our clients maintain the original quality throughout subsequent development iterations.
In this article, we are going to show you how to launch this add-on on a project built using the docker-console. Just like in our previous articles, our examples will be based on the project that you already know from our previous posts.
How does it work?
Upon the first launch, VisualCeption makes a “reference” screenshot of a given website or a list of elements specified in the test. Then, on every subsequent execution of the text, VC takes a new (current) screenshots and compares them to the previous versions – which is why the first execution always ends up with a positive score, since there are no base files with which it could compare the current state of the page. This comparison results in a percent value expressing the differences between the two images and a file specifying where the changes are. Right now all of that might seem a bit unclear, but I hope that as soon as we get to the end of the article, everything will be clear. So, without further ado, let’s move on to the configuration.
New test suite
Since this type of tests is executed rather slowly, we think it’s appropriate to create a new test suite in order not to slow down the remaining tests and maintain better control over all of them. In order to do this, open the terminal (in the project folder) and type in:
dcon codecept generate:suite visual
After running this command, the files necessary for launching the tests in the new suite will be automatically generated in our project. Most probably we’ll need to change the permissions and owner because root files will be generated.

Installation
When you follow the link to the project (https://github.com/Codeception/VisualCeption) you will see that it’s necessary to add VisualCeption to composer.json; however, if you’re using the docker-console, you can safely skip this step. Make sure that you have Imagick installed on your computer (https://www.imagemagick.org/script/index.php) – it’s used for comparing screenshots. Now it’s time to unlock the module in visual.suite.yml. Here we also need to add Webdriver (because it’s used for automating web browsers), so in the end, your config file should look similar to the one presented below:
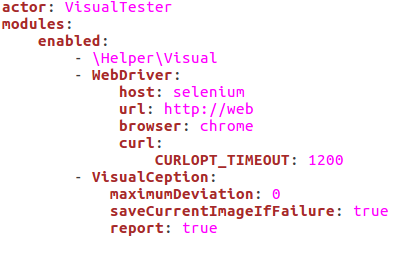
You can set the following parameters in VisualCeption config:
- referenceImageDir – VisualCeption stores the previous screenshots in order to have something to compare the current state of the page. By default, it creates a new folder named ‘VisualCeption’ in tests/_data.
- currentImageDir – on every subsequent execution of the test, VC creates new screenshots that are compared to reference ones, by default they are located in tests/_output/debug/visual/
- maximumDeviation – when comparing two screenshots, VC calculates a percentage difference between the images. This parameter specifies how big of a difference is acceptable and won't result in throwing an error. By default, it is set to 0, which means that even the slightest change will result in an error.
- saveCurrentImageIfFailure – if this value is set to true, in the case the test fails, the current state of the screen will be saved in a file with “current” prefix.
- report – by default, this option is set to false, but as soon as you unlock it, any failure will generate an HTML report found in tests/_output/vcresult.html. We will show you how it looks later on.
- module – this setting determines which module is responsible for interacting with the browser. By default, it’s WebDriver.
- fullScreenShot (default: false) fullpage screenshot for Chrome and Firefox.
- templateFile - absolute path or relative from module dir to report template, default "/report/template.php".
Chrome vs Firefox
As you could see before when running tests using WebDriver, we always used Chrome; however, in this case, the authors of VisualCeption recommend using Firefox.
We will follow this recommendation to show you how to use Firefox in your tests. Additionally, this configuration will demonstrate all the capabilities of this module, but of course, you are free to experiment with other versions of Selenium and various browsers.
If you want to use Firefox as a default browser for your project, you have to make some changes to the configuration of your environment. First of all, go to the docker_console folder and find dc_settings.py, where you have to change the Selenium image to the one used for the tests.
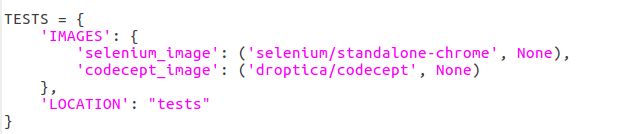
The line 'selenium_image': ('selenium/standalone-chrome', None), should be replaced with 'selenium_image': ('selenium/standalone-firefox:2.53.1', None). We will write more about configuring a project to be able to use many Selenium images in an upcoming article.
Now that we have a Selenium image with Firefox configured and ready, we also need to change the browser in the configuration files of the test suites using Webdriver. In our case, this is going to be visual.suite.yml and js_capable.suite.yml
In this case, your tests will be executed using Firefox. After this change, you need to ensure that the tests written previously still work properly, because it may turn out that the test code also needs some fixes – thankfully, everything went swimmingly in our example project and we didn’t have to fix anything here.
If, you sill want to use Chrome for your tests and take a full page screenshot. You can use the fullScreenShot option in this module configuration or for each test dynamically set the page height (it works with the docker, where the physical size of the screen doesn't limit us).
Use in tests
Using this module in tests is very simple because the way it works is mainly based on two additional functions:
- seeVisualChanges, which returns an error if no difference is found on the page and
- dontSeeVisualChanges, which returns an error if there are any differences visible on the page.
Both of these functions can be used with different parameters in order to better determine what we want to check on a given page.
This is why in order to check the page for changes visible on user’s screen, we are going to write a test similar to the one below:
 public function page(VisualTester $I) {
 	$I->wantTo('Test - compare homepage');
 	$I->amOnPage('/');
 	$I->dontSeeVisualChanges("homepage");
 }
In that test, the “homepage” parameter will be a unique name for the screenshot taken in this file, thanks to which VisualCeption will know which two files it should compare. After running the test, we will get a screenshot similar to the one presented below:

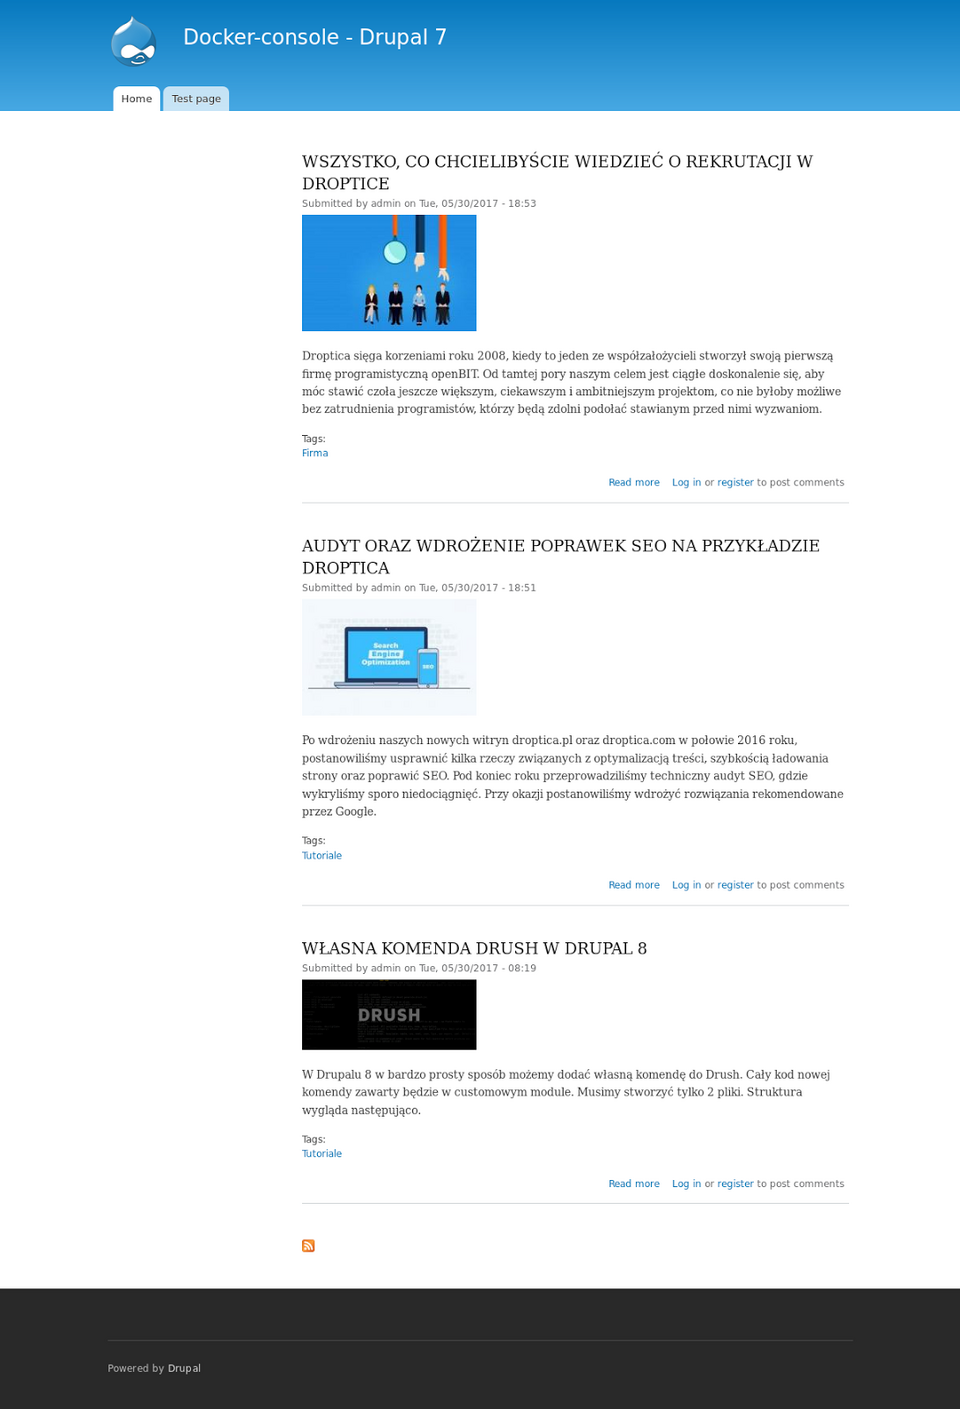
If you want to take a screenshot of the entire page, the test should look similar to the one below:
 public function page(VisualTester $I) {
 	$I->wantTo('Test - compare homepage');
 	$I->amOnPage('/');
 	$I->dontSeeVisualChanges("homepage");
 }
What we did here was adding a second parameter, a “#page” CSS selector, which is a container with all the content on the page. The differences in the area to be compared will be easily seen as soon as you check the screenshot taken this time around. 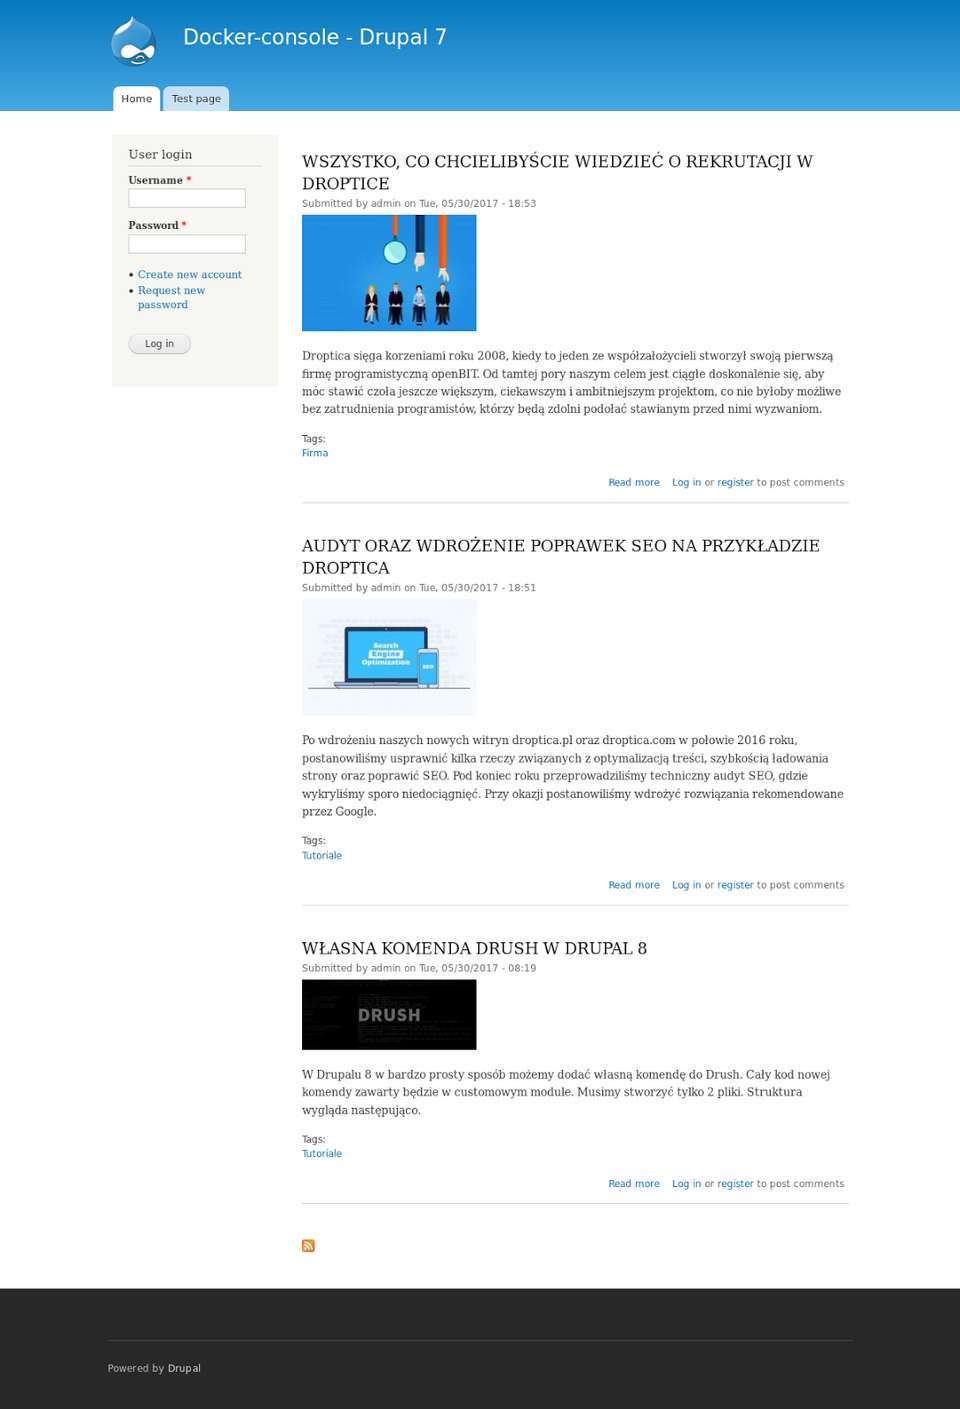
Using this method, we can also track changes in smaller elements of the page, such as the header or footer.
Another possibility enabled by VisualCeption is excluding elements which we don't want to track on the page. This is a very helpful function if for example, you want to check the layout of a page that shows a randomly selected image, which will be different each time the page is reloaded. This is why if the test looks like the one below, the screenshot will not contain the log-in box.
public function notFullPage(VisualTester $I) {
 	$I->wantTo('Test - compare homepage not full page');
 	$I->amOnPage('/');
 	$I->dontSeeVisualChanges("homepage-not-all", "#page", "#block-user-login");
 }
The last parameter we can add to the test is its sensitivity to changes on the page – its default value was already set up in the config file. Here, we can increase or decrease the percentage of differences on the page that will result in an error during running our test. Such a change might be useful if we want to check the website for changes, but one of the pages contains a small variable element that is a part of a bigger whole and we don’t want to exclude it from the test. An example of such element can be a visit counter – it will display a different value every time, but that does not mean it has to be excluded. The test shown below will return an error only if the changes encompass more than 5% of the page.
public function deviation(VisualTester $I) {
 	$I->wantTo('Test - compare homepage deviation');
 	$I->amOnPage('/');
 	$I->dontSeeVisualChanges("homepage-deviation", "#page", "#block-user-login", 5);
 }
Reports
Now, when we already have several tests written to check for layout changes on the main page, we can move on to running them for the first time, so that the reference screenshots are taken. The tests should be run exactly like the other ones, using “dcon test”, or if you're interested only in this one suite, use “dcon test visual” instead.
After the reference screenshots are taken, you can change something on your website to see whether your tests are working. For my example, I’m going to change the page title and run the test again. The first three tests failed, but the fourth one didn’t throw any errors, even despite changing the title. This is because we overwrote the sensitivity of the test – the percentage of the change was too small to trigger an error.
Of course, you can check what kinds of tests resulted in what errors in the “raport.html” file, exactly like with other tests. It contains information regarding all the tests that failed, as well as the percentage difference between the compared pages.
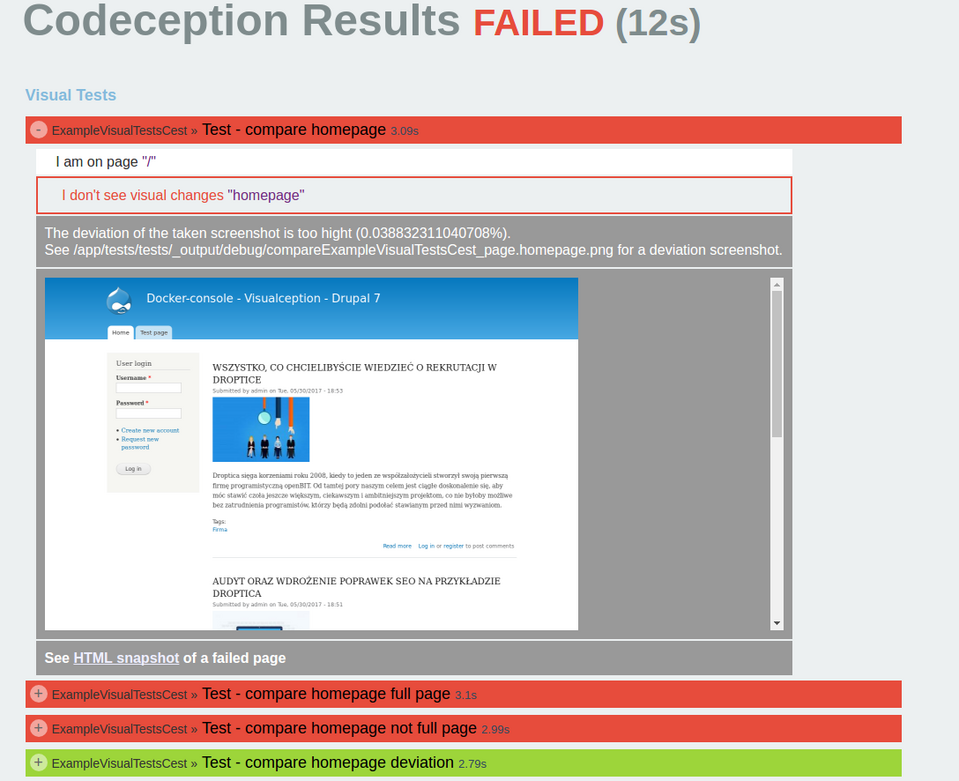
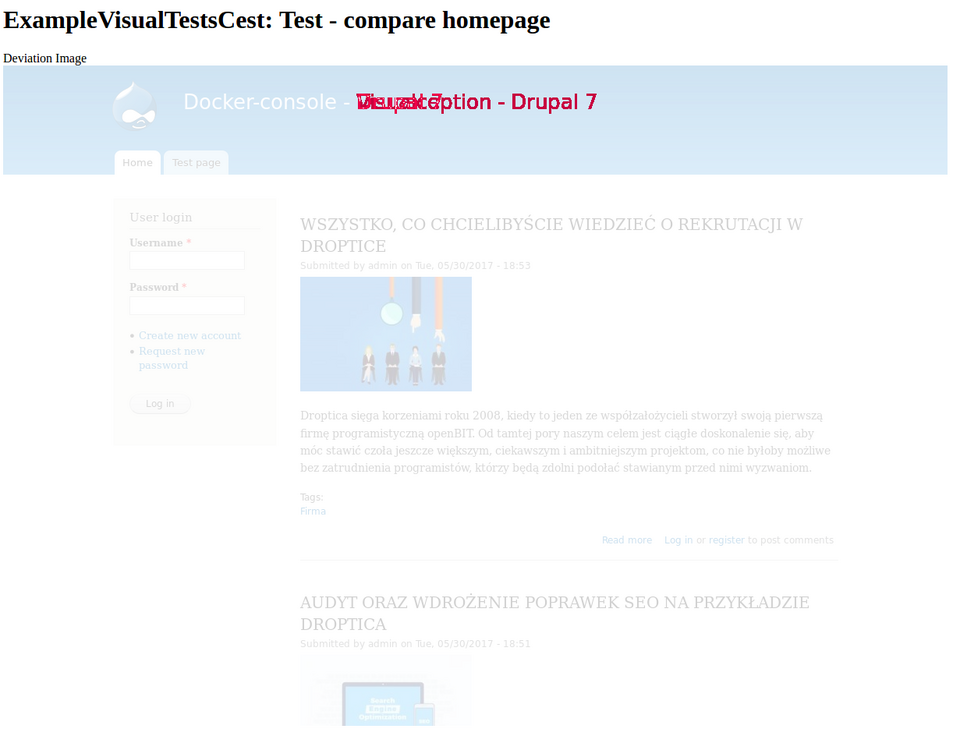
With such tests, this information might not be enough. This is why there is another file at your disposal – vcresult.html – containing three images under the name of each failed test. The first image presents the differences found during the comparison, marking the differing pixels in red. The following two images present an expected and current result.
Project files
You can run the examples described in this article by downloading them from the project repository and changing the branch to visualception.
Project repository:
https://github.com/DropticaExamples/docker-console-project-example
Database dump:
https://www.dropbox.com/s/r0o3u9gjp3dccd4/database.sql.tar.gz?dl=0
Project files:
https://www.dropbox.com/s/hl506wciwj60fds/files.tar.gz?dl=0
Summary
I hope that this article inspired you to experiment with VisualCeption on automating tests for your projects. This module is really useful, especially if your project is very sensitive to all changes in the page layout. After all, it's widely known that a human checking the page can have a worse day and gloss over a small and seemingly insignificant change. Automated tests will track each change to a single pixel; however while implementing these tests you have to remember that they are significantly slower (compared to other types of tests) and memory hungry.
If you liked Codeception tests, keep track of our blog, because this is not the last article concerning this topic.