How to install Droopler on Cyber Folks (Linuxpl.com)


Cyberfolks (old name: Linuxpl.com) is one of the most popular hosting service providers in Poland. Here you'll find Droopler, a Drupal distribution, installation instructions for this hosting.
Step 1. Prepare server
First, we configure the database and PHP. This stage is very important because without it the installation of Droopler won't be possible.
The requirements that must be met by the system on which we want to run Droopler can be found on the Drupal.org website.
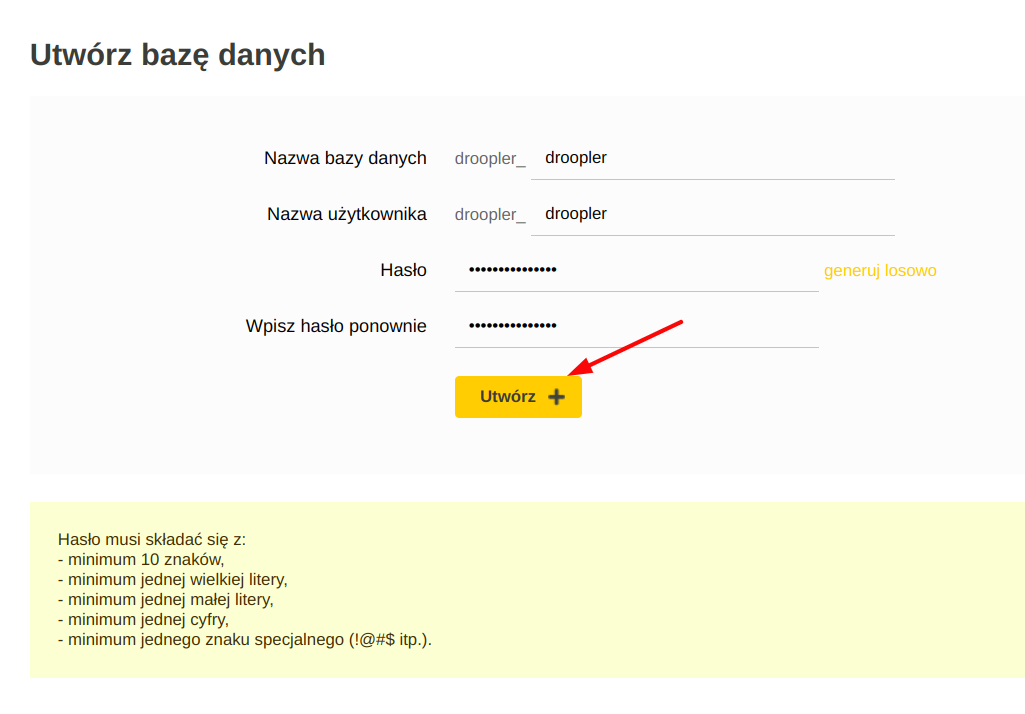
1. After logging in to the admin panel, we need to create a database. To this end, we select Create a new MySQL database option.

2. We provide the necessary data to create the database and click the create button.
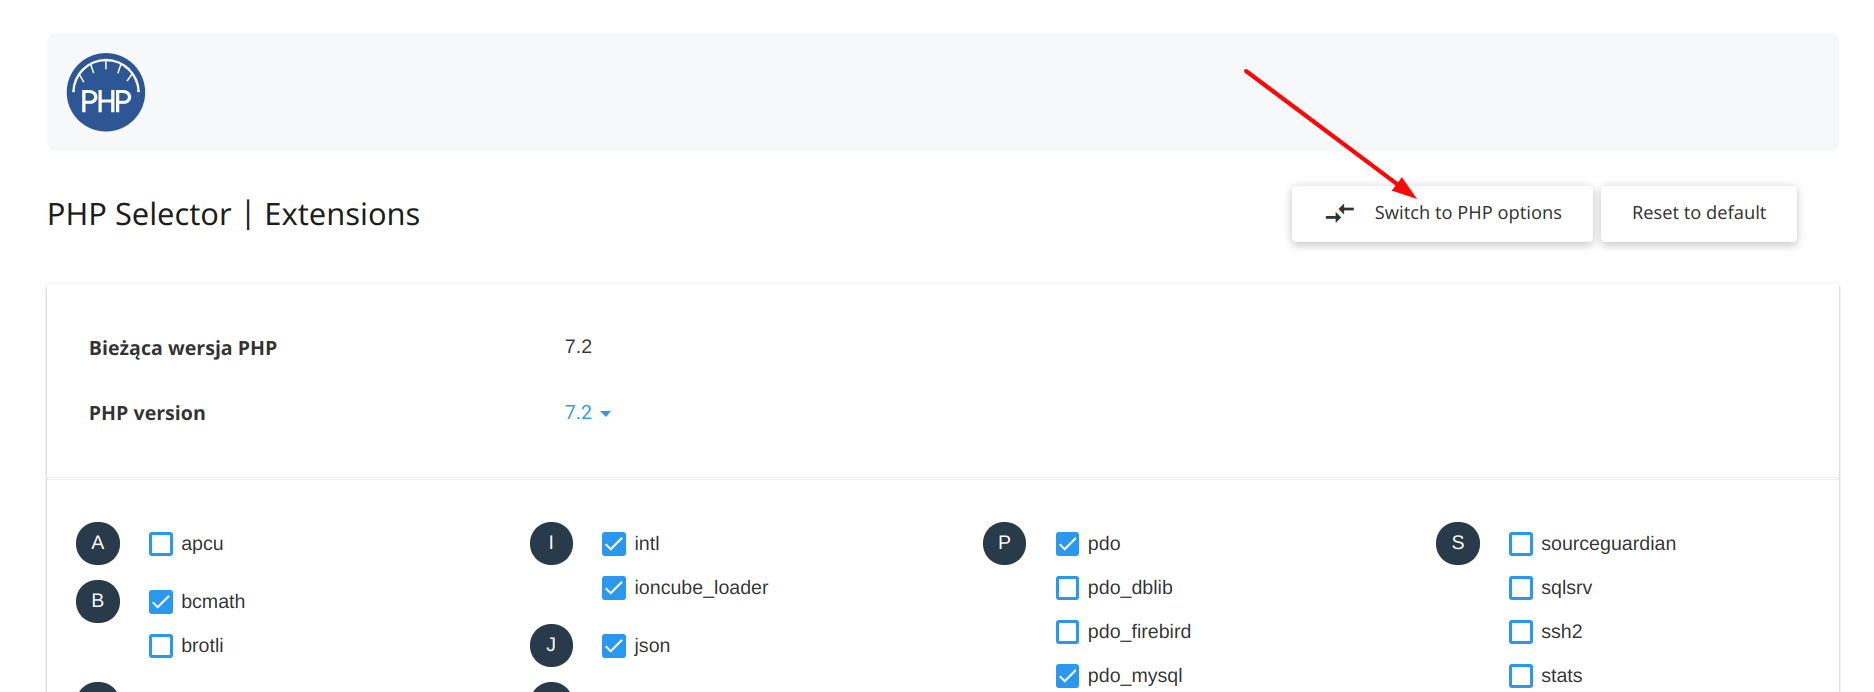
3. Then we change the settings for PHP. We need to increase the amount of allocated memory for executed scripts. We'll find it in section PHP - ustawienia globalne.

4. We go to the PHP Options tab.
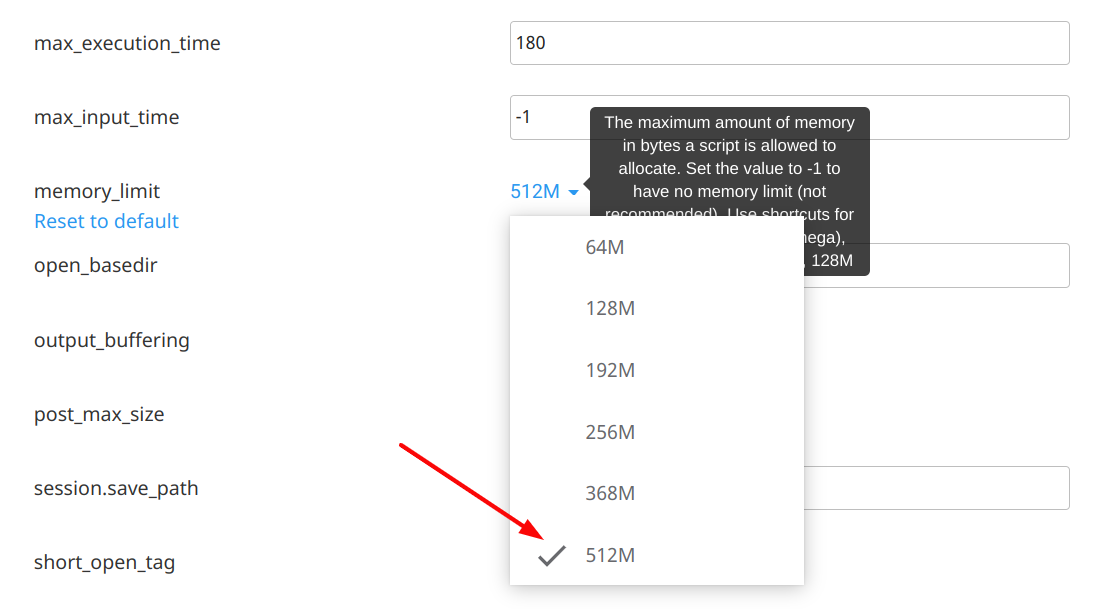
5. We change the value for the memory_limit option to 512M.
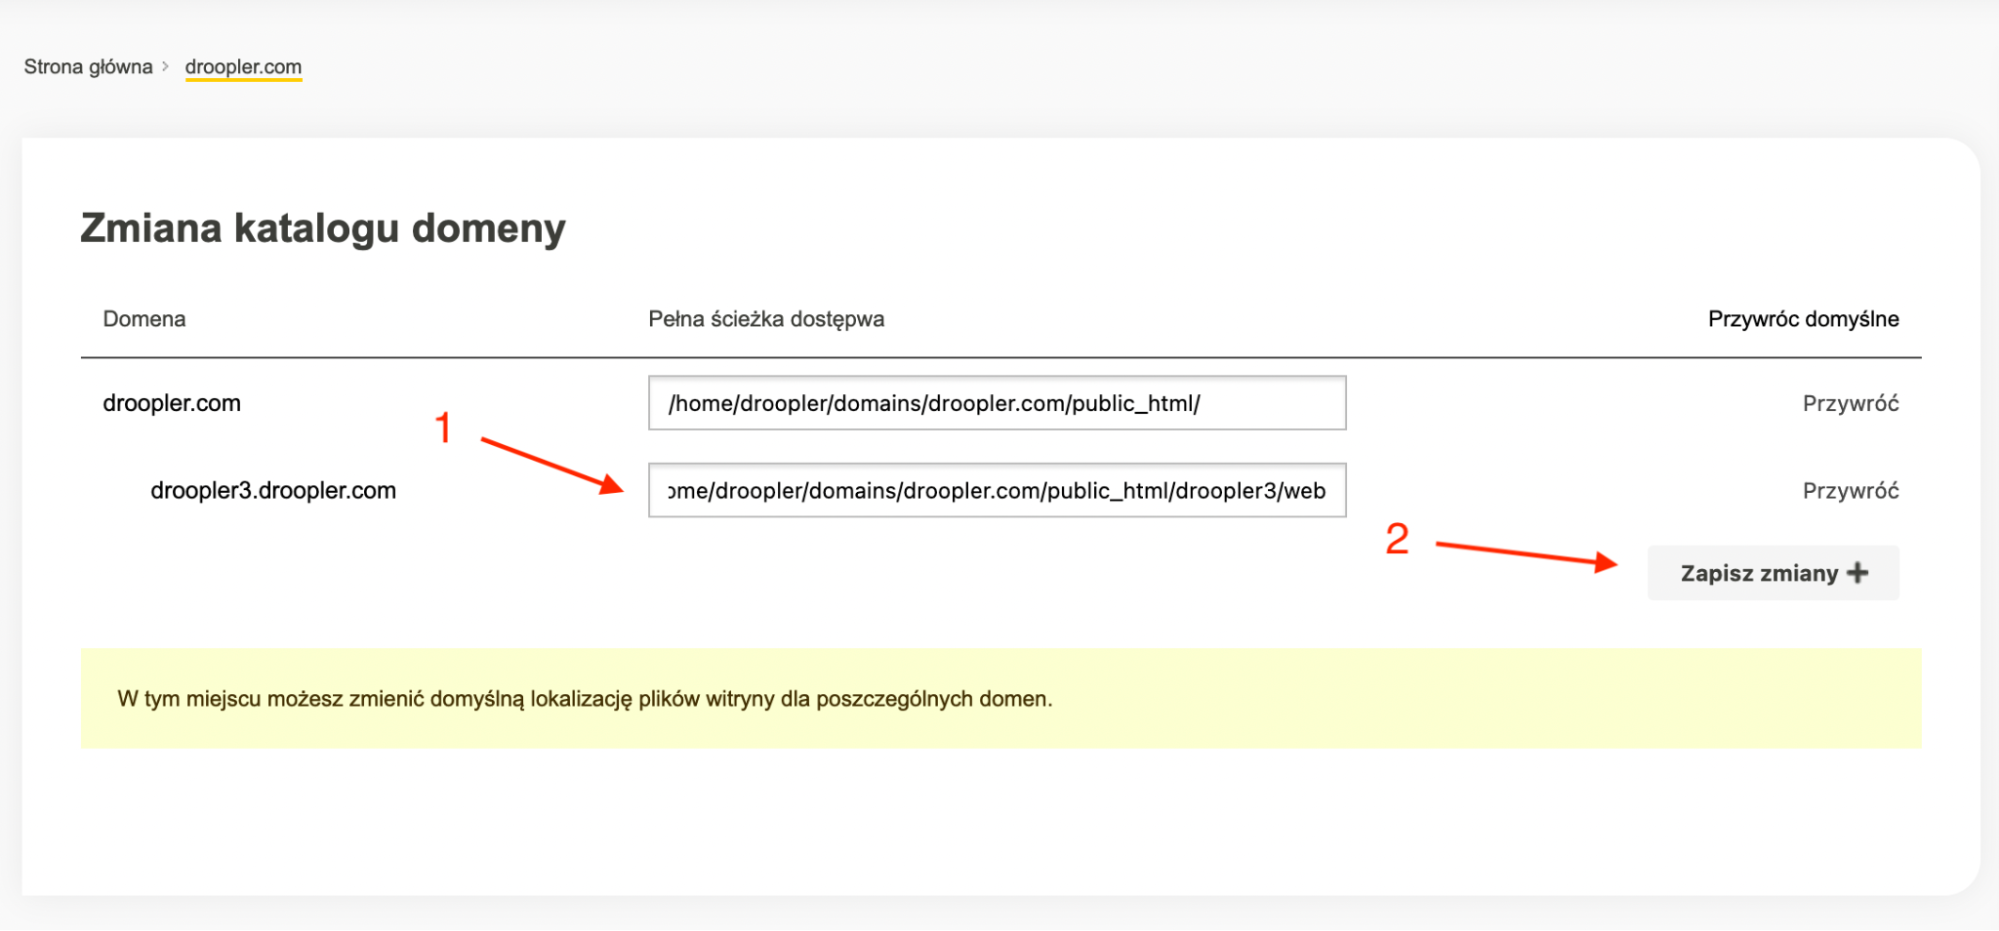
Step 2. Changing assignment of a directory to a domain
We’ll install Droopler 3 using Composer, so we need to place the public web directory next to the vendor folder. To illustrate this, we’ll add the droopler3 subdomain to the droopler.com domain. To do this, we need to change the assignment of the directory to the domain/subdomain.
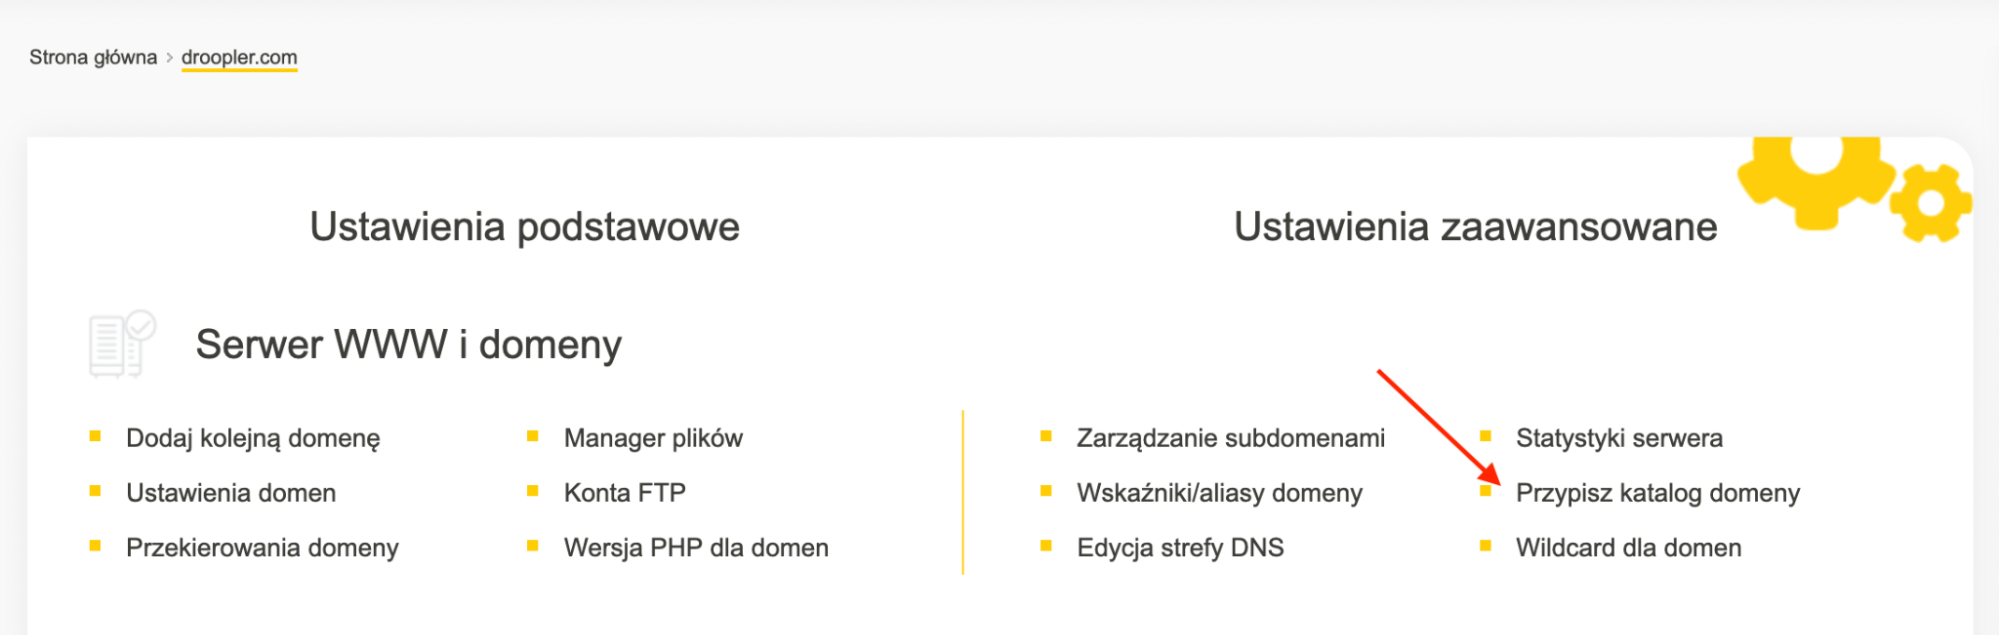
After navigating to the subpage of editing directory assignments to domains, we change the path for the domain/subdomain of interest so that it links to the web folder.
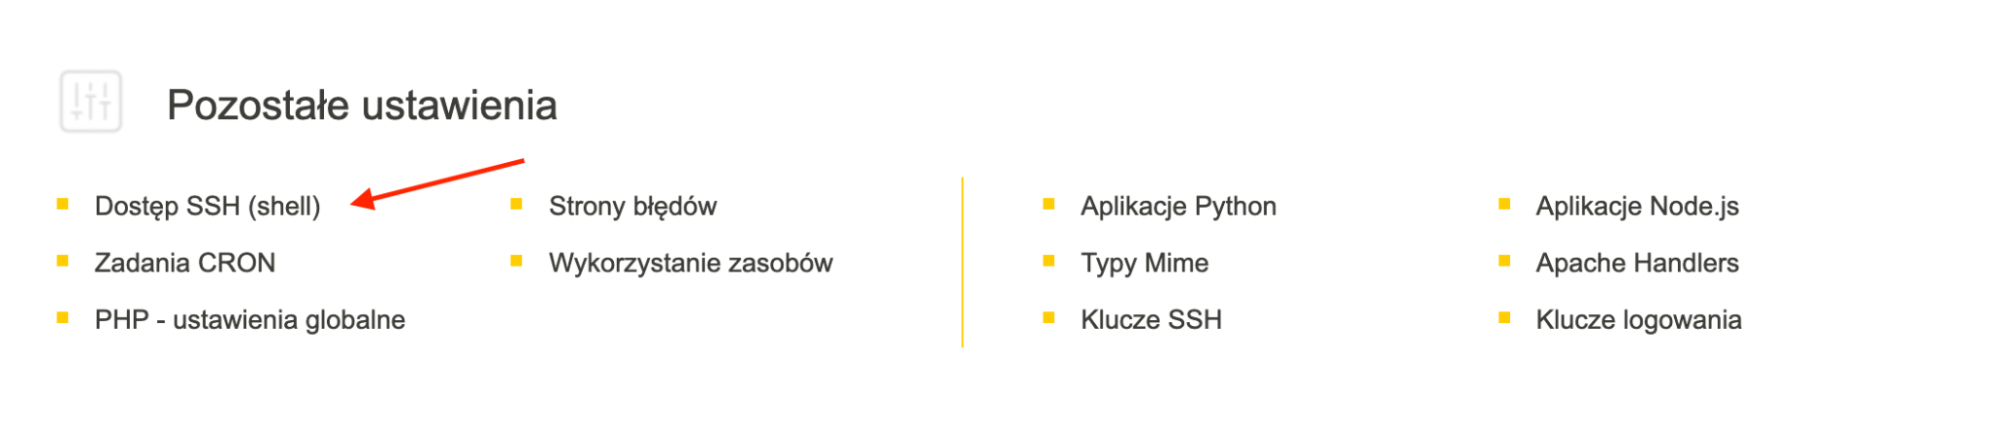
Step 3. SSH enabling
Remember that the minimum PHP version required by Droopler 3 is 7.2, so if you’re using a lower version on the CLI side, you should change it according to the instructions on the cyber_Folks website.
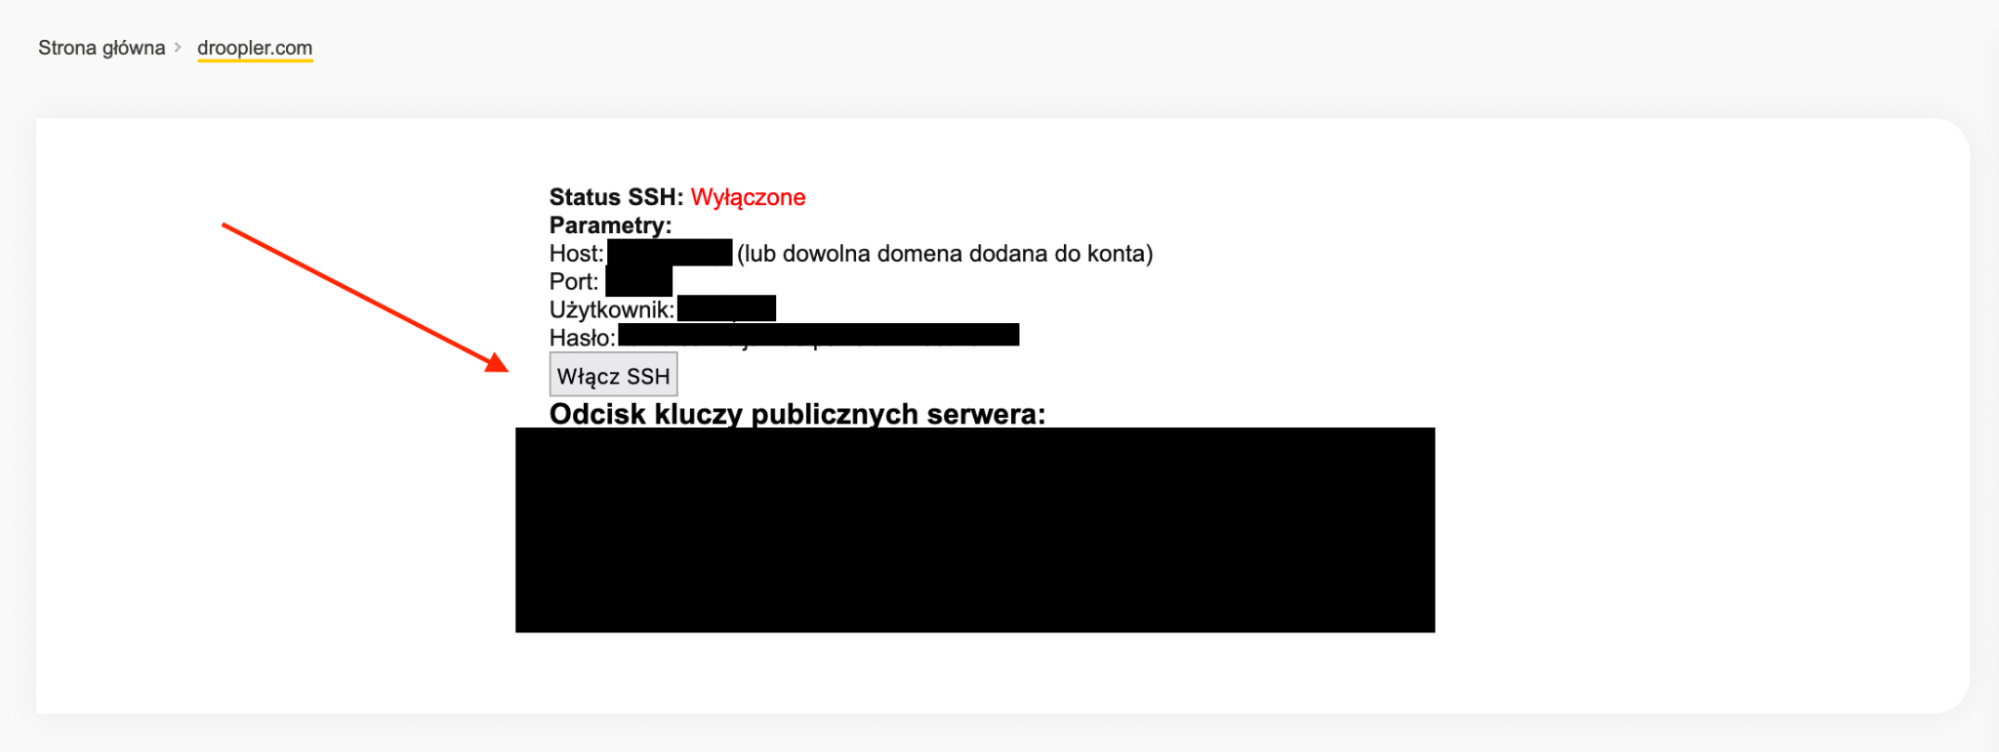
To install Droopler using Composer, we need to log in via SSH to our server. First, we need to make sure that SSH is enabled.
After going to the editing subsite, we press the Enable SSH button and wait a few minutes.
Step 4. Composer installation
In this step, we need to install Composer, as instructed by cyber_Folks.
Step 5. Droopler installation using Composer
We log in using SSH to our server at cyberfolks.pl and we navigate to the directory where we’ll create and install a new instance of Droopler.
composer create-project droptica/droopler-project droopler3
$ cd droopler3
$ composer drupal:scaffold
$ composer install
Step 6. Compilation of SCSS files to CSS for droopler_theme
The last step we need to do before installing Droopler itself is to compile SCSS files into CSS files. To achieve this, we need to add two Node.js applications in the panel:
the first one – for the needs of the superior theme,
the second one - for the needs of our own subtheme.
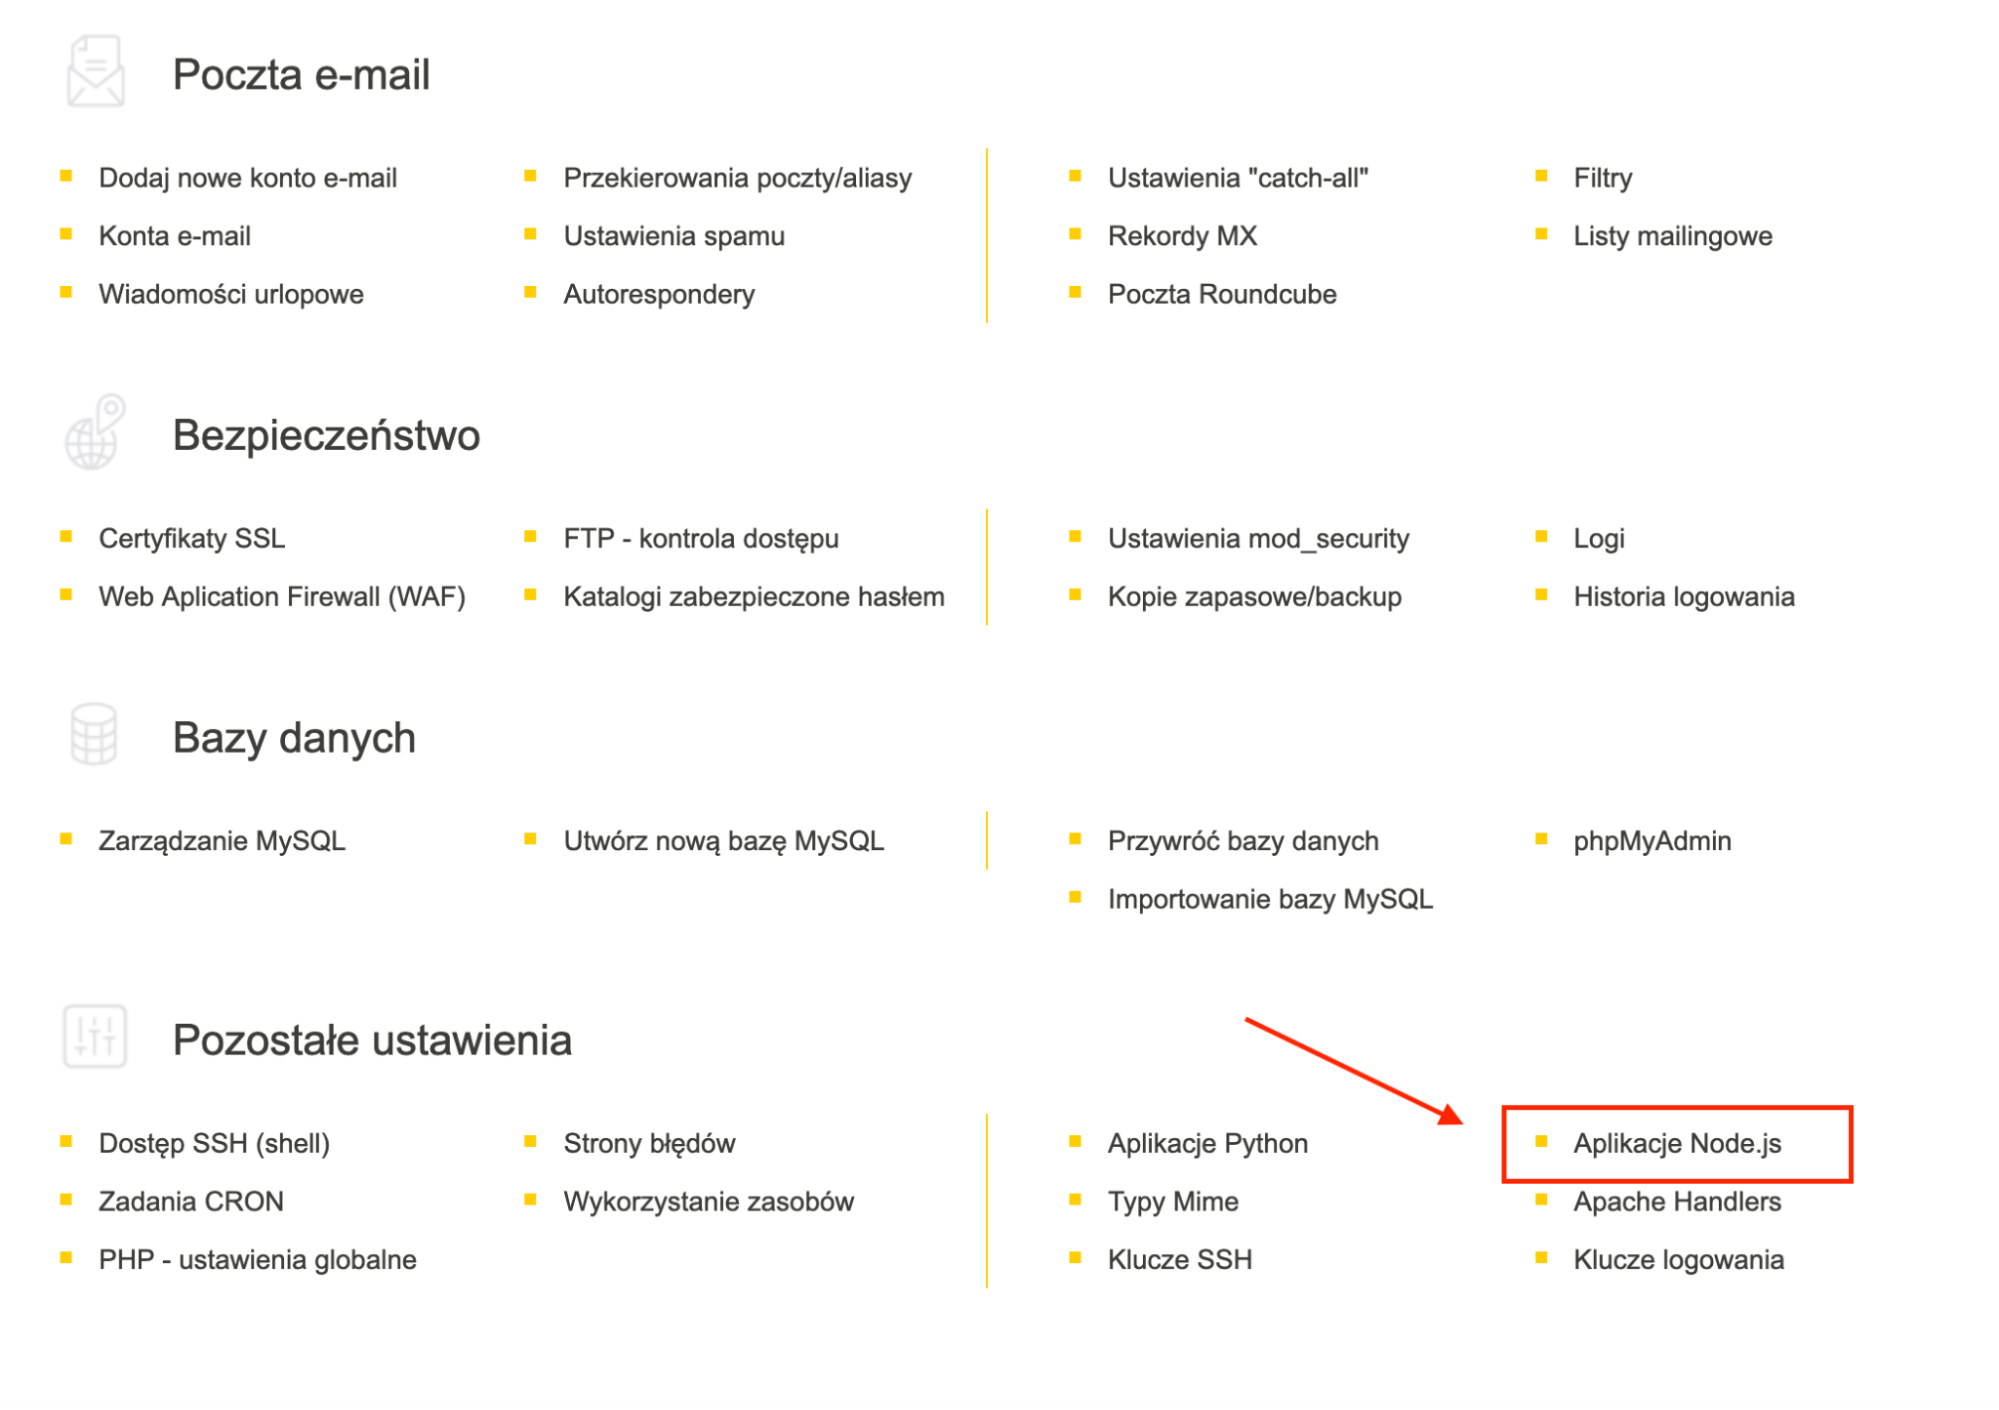
Therefore, we return to our administration panel at cyberfolks. pl and navigate to the section Other settings then select there Node.js Applications.
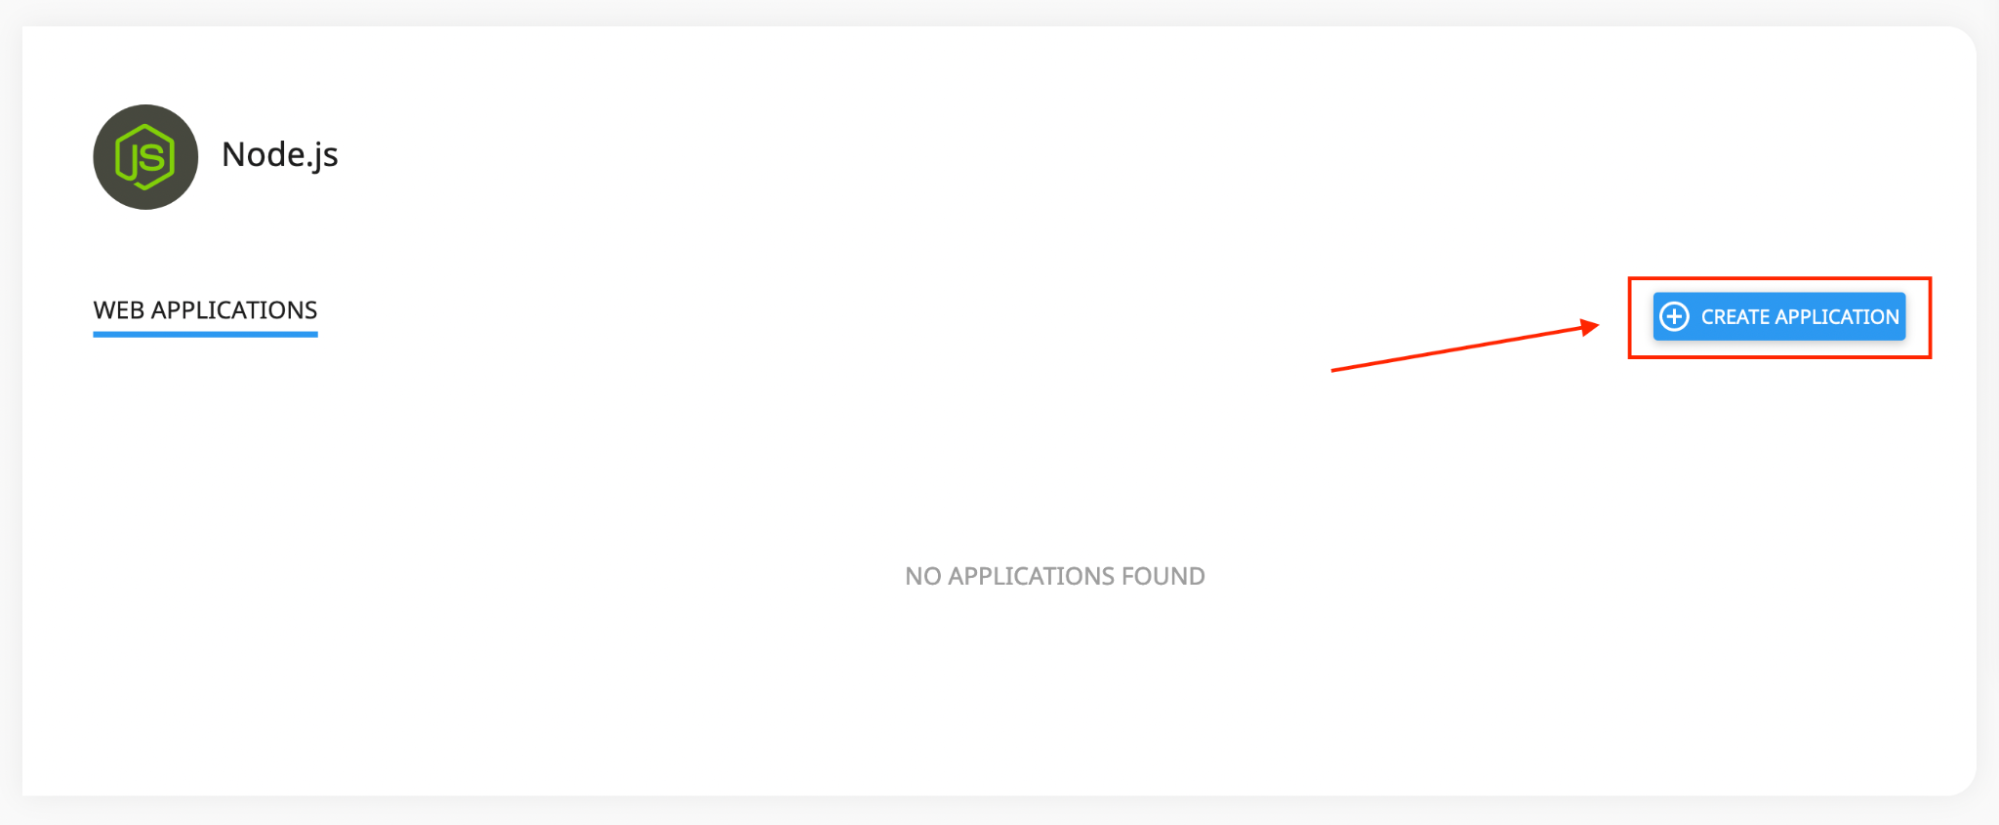
After navigating to the subpage with the list of Node.js applications, we add the first of the applications. In order to do so:
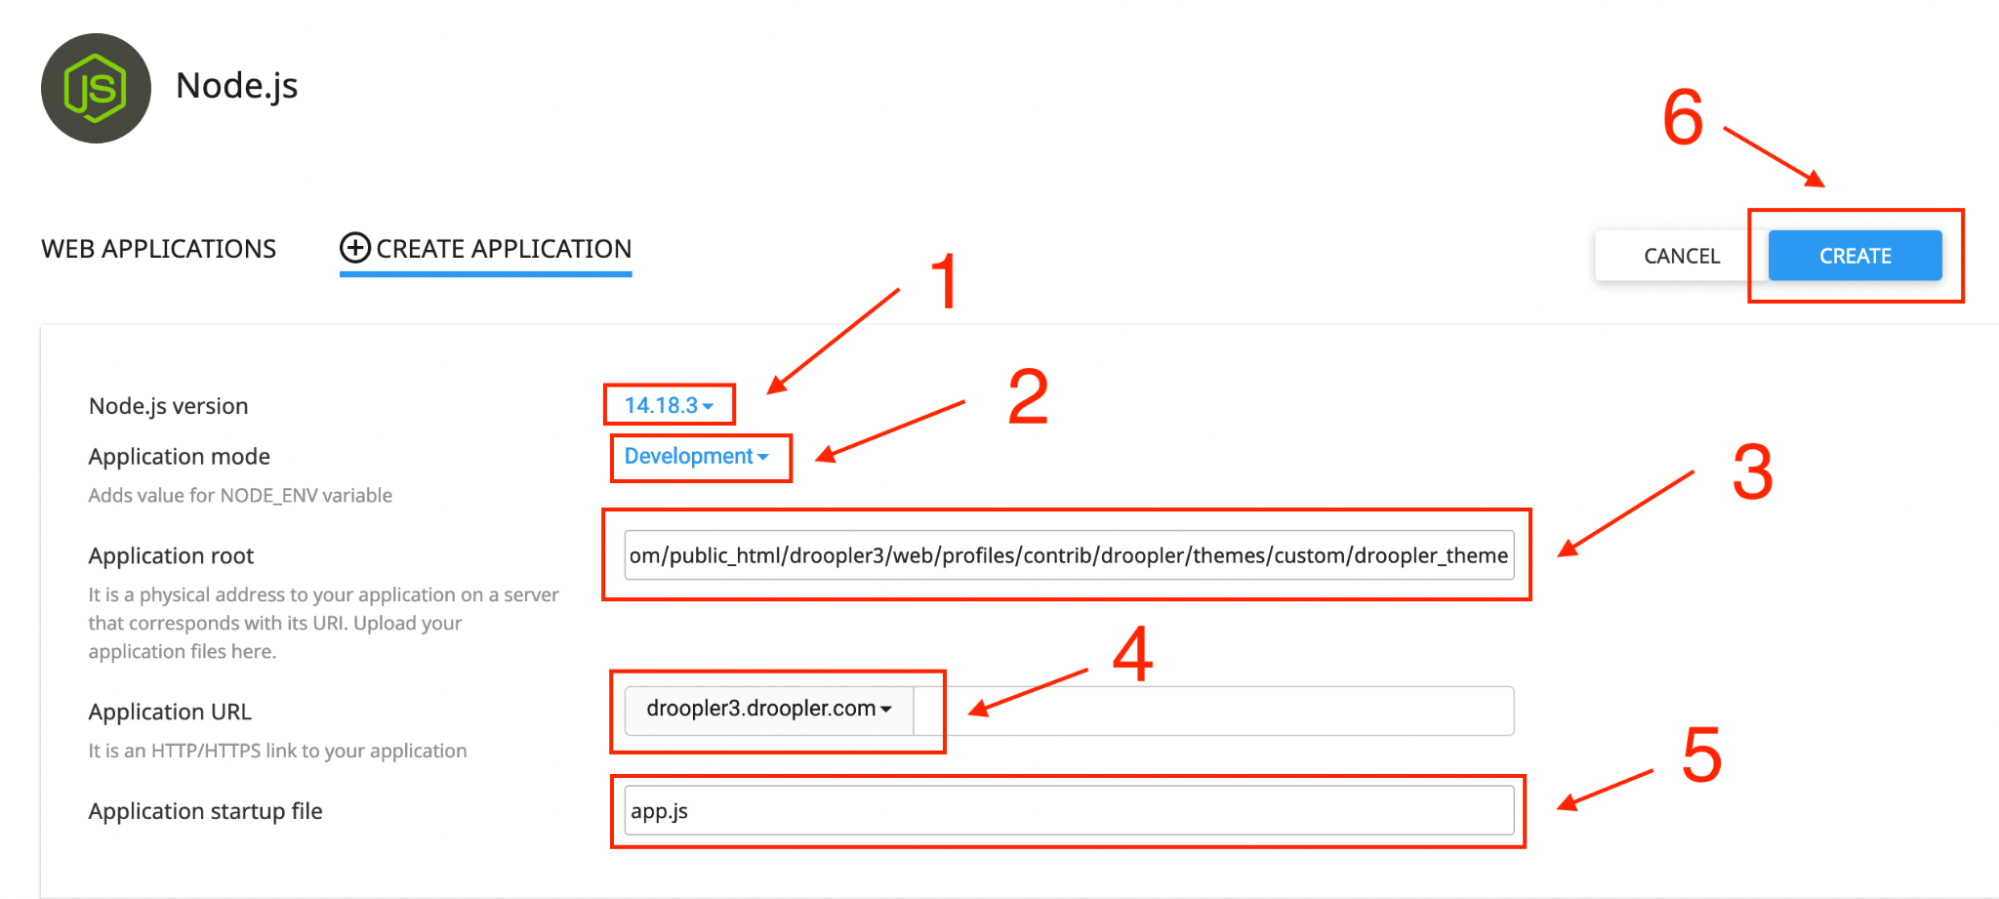
We select node.js version 14.*.
We set Application mode as development.
We paste the absolute path to droopler_theme into the application root field. In our case, it will be: /home/droopler/domains/droopler.com/public_html/droopler3/web/profiles/contrib/droopler/themes/custom/droopler_theme
In Application URL, we choose the domain/subdomain we’re interested in. This field doesn’t have any impact on the operation of a given domain/subdomain, as we don’t run any Node.js application at this address, but we use the Node.js application to compile SCSS files.
We enter app.js in the Application startup file field.
We press the Create button at the top of the screen.
After creating the Node.js application, the package.json file should be automatically detected in the administration panel. The next step is just to install dependencies needed to compile SCSS files:
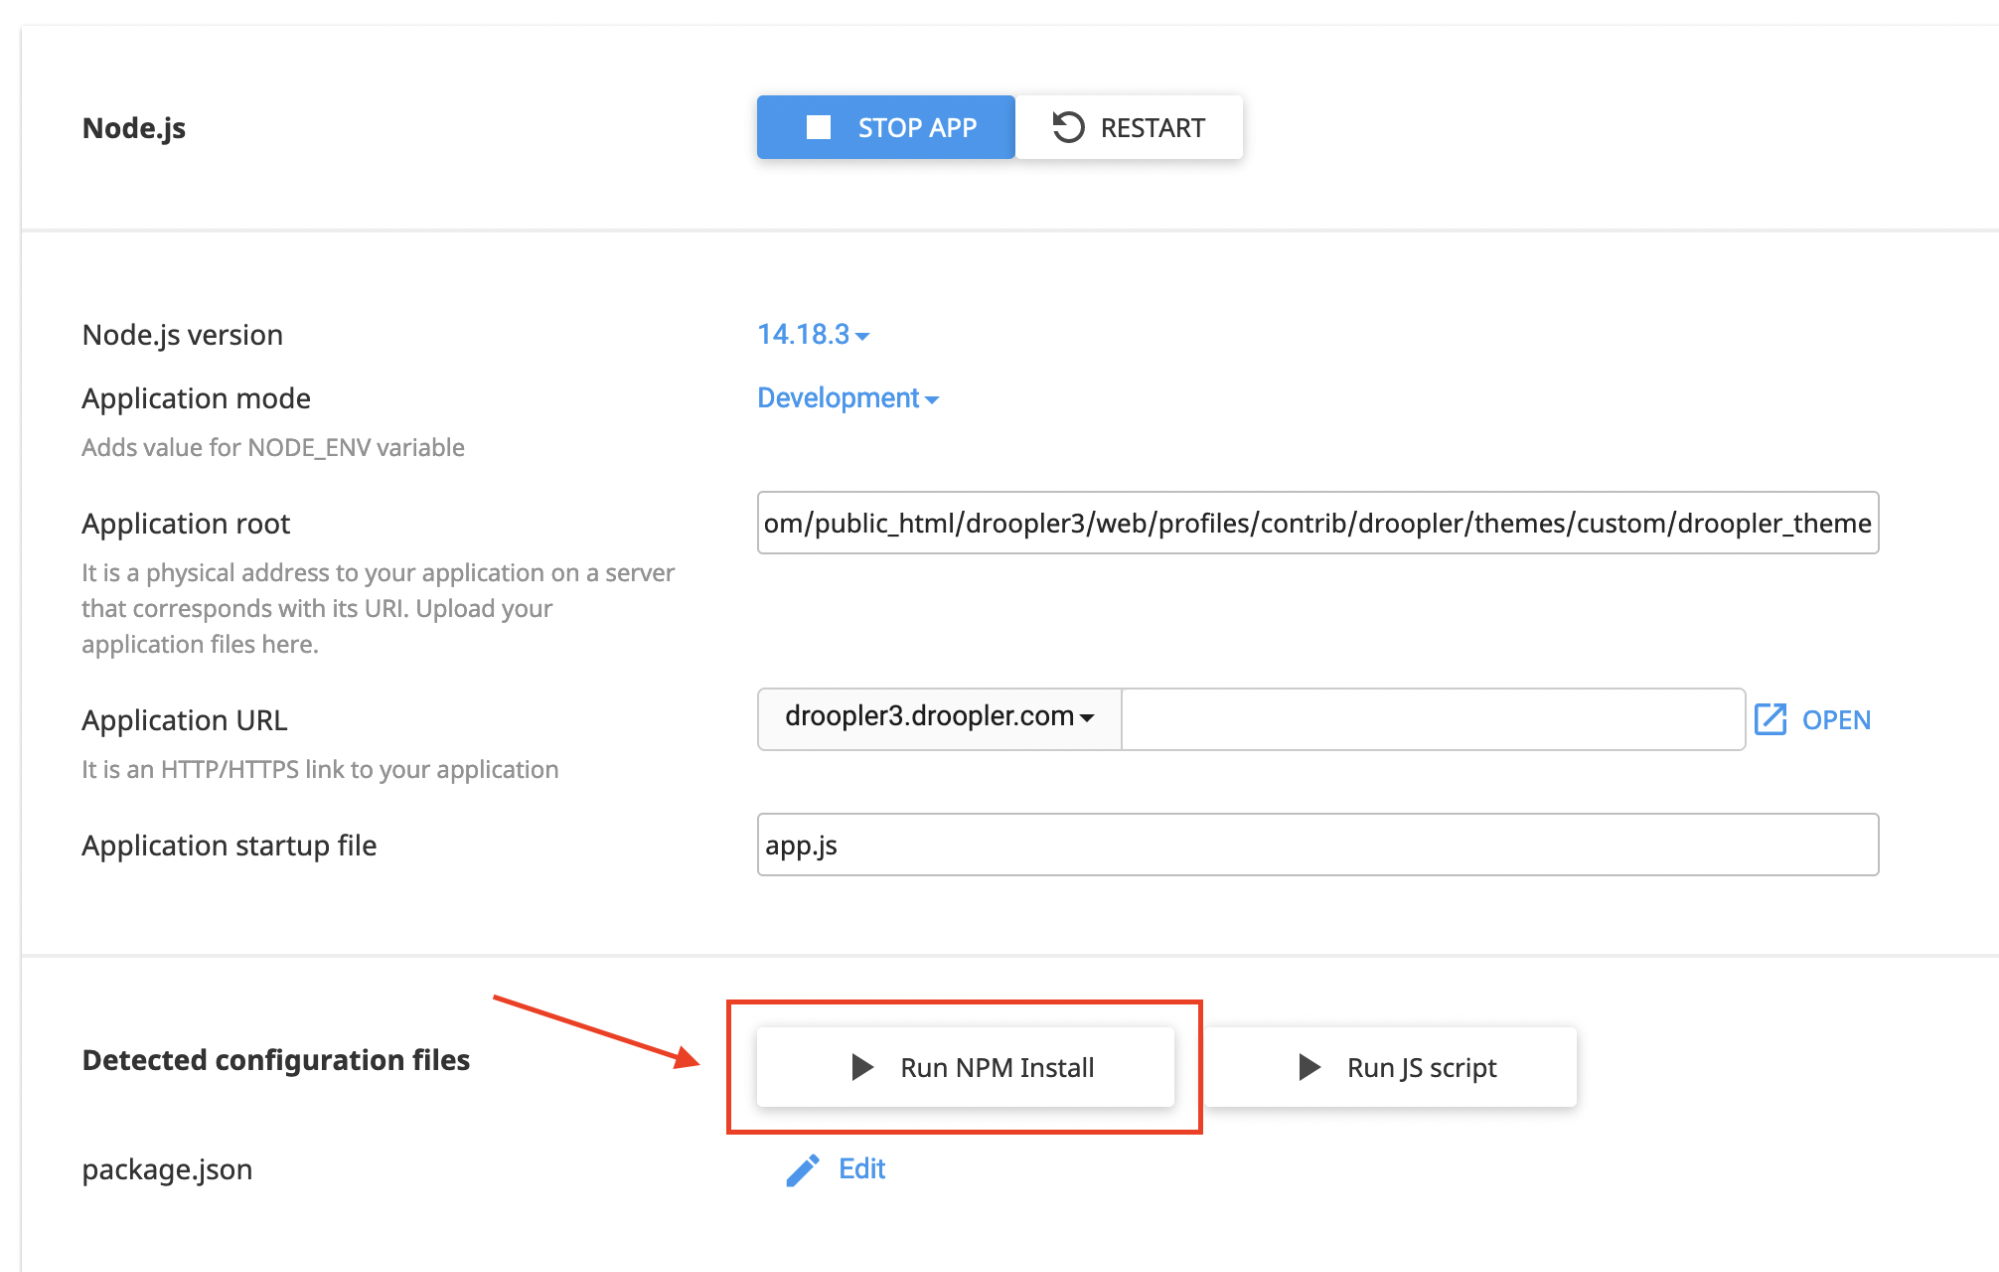
After installing the dependencies, we’re ready to compile SCSS files. For this, we need the command line again and to log into the server with SSH. After logging into the SSH server, we paste into the command line the command that the Node.js application showed us, right under the name of the application:
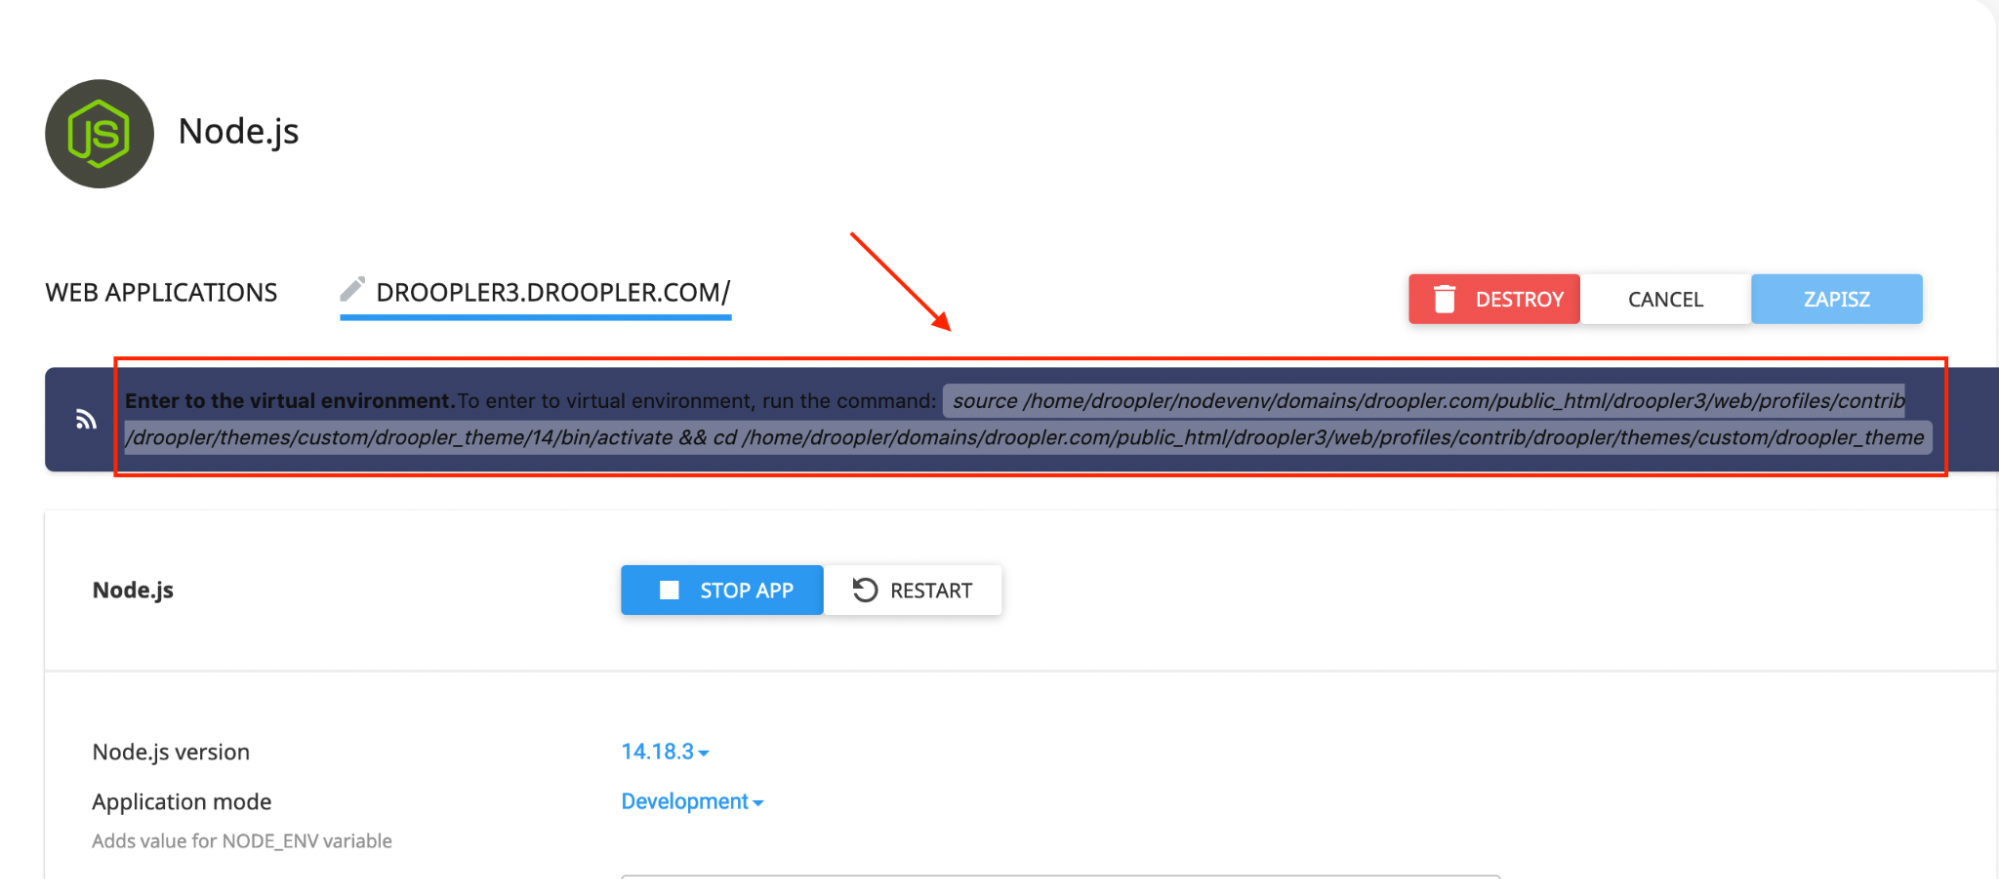
After entering the virtual machine of the Node.js application, we need to install gulp using the command:
npm install --global gulp-cliNow we can proceed to compile SCS files with the command:
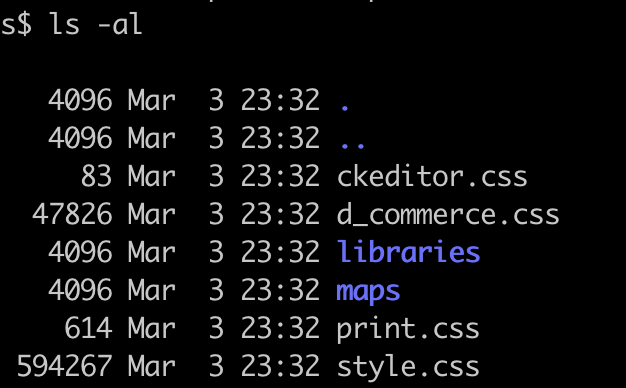
gulp compileThe result of the compilation should be the creation of a css folder and CSS files inside this folder:
Step 7. Compilation of SCSS files to CSS for droopler_subtheme
Step 7 looks exactly the same as step 6, we just need to change the path in the Application root field so that it refers to droopler_subtheme. In our case, this path is:
/home/droopler/domains/droopler.com/public_html/droopler3/web/themes/custom/droopler_subtheme
We perform the remaining steps and settings exactly as we explained in step 6.
Step 8. Installation of Droopler 3
The last step left is to install Droopler with the options or configurations we’re interested in and then enjoy its functionality.