
Become an Open Source programmer in the Drupal community

As one of the most popular CMS platforms, Drupal has a huge community built around it that works every day, both on the development and improvement of the system's core and on the projects extending its functionalities. The community's motto is: "cooperation instead of competition" – instead of offering many competing modules, individual solutions to solve a given problem are being created.
The modular system allows even less experienced Drupal developers to help in everyday programming works on various types of projects. So how can you add your own contribution into the Drupal's environment?
Before I create my own project
1. Research!
Before you launch any project, first carefully check out whether such a project has not been already created. It may turn out that, e.g. the module that you would like to create already exists or it would be enough to submit a proposal for extending its functionality. It is also good to take a look at the list of proposed modules and support someone's development works.
2. Your profile at the drupal.org web portal
If you do not have your own account at the drupal.org portal yet, we would like to strongly encourage you to create it. Thanks to this you will be able to create new projects as well as report problems and patches regarding the existing projects.
3. A sandbox project or a full project?
The drupal.org web portal allows you to create two types of projects. The first of these is a sandbox project. It is basically a testing ground for newly developed modules. Usually, its creators do not take any responsibility for its code until they finish working on a version that meets at least the basic requirements for functionality and stability. At this stage, a sandbox project is usually promoted to a full project within which it is possible to create versions, releases, notifications, etc.
Creating a project
The project creation process is not particularly complicated. At the beginning, only some basic information is needed – you do not even need to have any actually existing code.
You can add your own project from the level of your profile by going to the Your projects tab, or directly from the Add a new project web page.
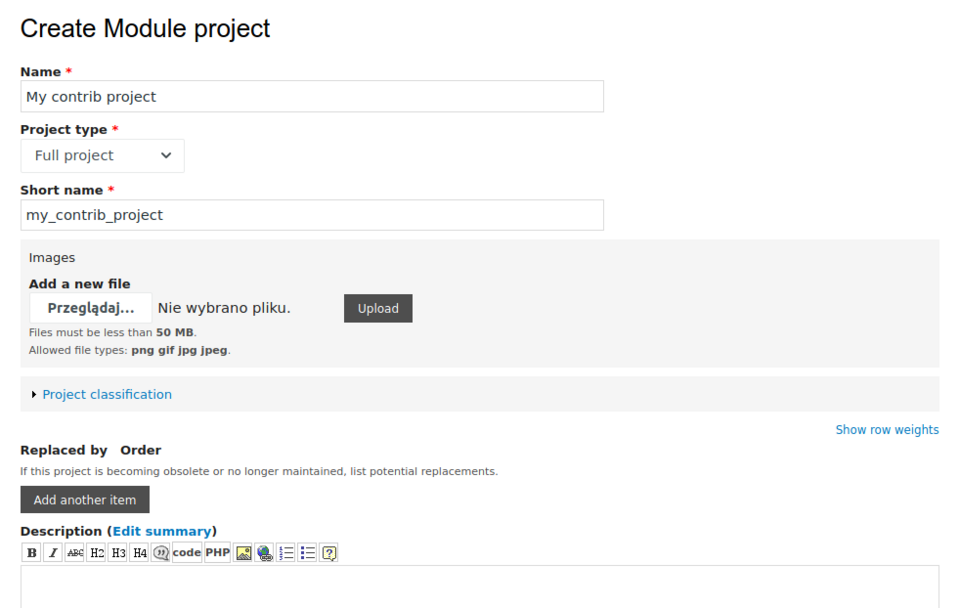
You choose the project type. It is going to be a module in our case.
You fill out the field with the module name, machine name (short name), and the project type (sandbox/full).
In addition, it is good to provide the name of the organisation supporting the development of the project (this is an additional form of promotion for the company) and the additional people who will cooperate in maintaining the project.
Codework
1. Git
At the beginning, you need to gain access to the repositories based on the Git version control system. The Drupal.org web portal uses the GitLab platform, which is partly integrated with the web portal itself. You must add your SSH key when editing the profile.
For Linux systems, the most common command to download the content of your SSH public key is:
cat ~/.ssh/id_rsa.pubThen in the Git access section, you first have to give some necessary consents, as well as configure the username and email address if they are not the default profile data.
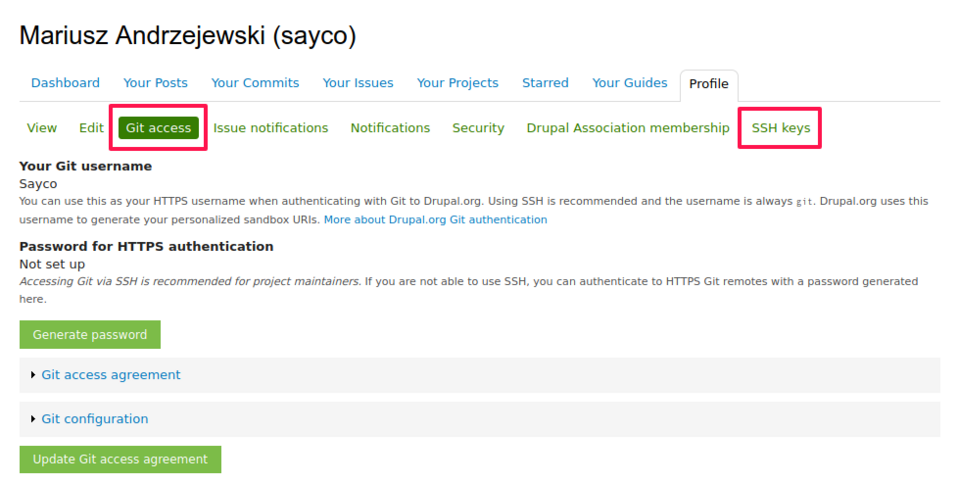
After gaining access to the version control system, when working on selected repositories your changes can be approved both by using a public email address or an anonymised address provided by the drupal.org web portal, e.g. [email protected].
2. Developer branch
All the contrib projects, as well as the Drupal's core, stick to a fixed version numbering convention.
For the core it is e.g. (8.8.5), according to the scheme:
[MAJOR VERSION].[MINOR VERSION].[PATCH]For contrib projects it is e.g. (8.x-2.x), according to the scheme:
[MAJOR CORE VERSION].x-[MODULE VERSION].xIf you are currently working on the 1.15 module version, then the main branch of the version, and also the development branch, is the branch: 8.x-1.x
Developer branches do not require an additional '-dev' suffix or adding a tag. However, for a development branch to be visible on the project's web page, a new release must be created.
3. Crating pre-releases and releases
When you feel that the project you are working on is beginning to take shape, and more and more functionalities are meeting your goals, it is good to create a pre-release, which is, in fact, an unstable release.
In accordance with the adopted convention, such releases should be followed by the suffix -[type][number]. At your disposal are these types:
- alpha,
- beta,
- rc (release candidate)
which very simply define how close your project is to achieve its stability. You can find more information on this topic in the article Release naming conventions.
However, if you are convinced that your module is fully stable and well-tested, you can create a stable release (without any suffix), e.g. 8.x-2.5.
Whatever path you decide to take, you must first add a git tag on the basis of which your release will be created. You can do this using the command:
git tag 8.x-1.1-alpha1Next, you have to send to the repository the changes you have introduced:
git push origin 8.x-1.1-alpha1 - pojedynczy tag
git push origin --tags - wszystkie tagi
The tag sent this way can now be used to create a new release (in the project edition – Releases/Add new release).
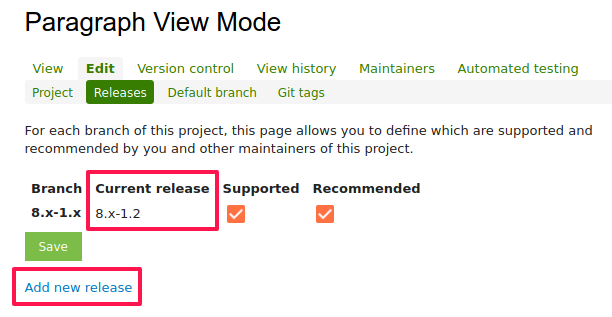
Please note that each tag can only be used once, and the tags already used can never be removed from the repository (they are blocked).
Maintaining the project
1. Issue queue
This is where the project is really alive. Any errors, suggestions for improvements, new functionalities, etc. are being issued here (a sample issue queue for the Droopler project). Every logged-in user of the web portal can add new issues, comment, as well as issue patches.
Every issue has a status the default value of which is "Active". The full list of statuses can be found in the article Status settings of issues.
2. Issuing and accepting patches
Patches can be added to an issue as an attachment in a comment or added to a newly created issue. The list of patches issued can be found in the summary, under the first post in a given issue.
If a patch has been issued for your project, then as the author you should verify it and change the issue status accordingly. If the proposed patch works correctly, you should commit it, honouring the patch's author by adding the --author parameter, e.g.
git commit
-m 'Issue #[issue number] by [user name]: [issue title]'
--author="Sayco <[email protected]>"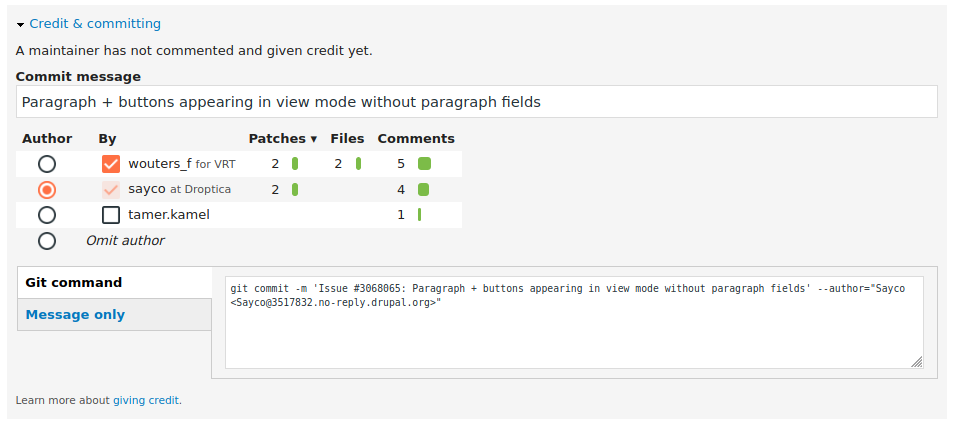
In the event that you find an error in the functionality of one of the projects, or the Drupal's core itself, you can issue your own patch also. In order to start working on such a patch, you need to take several steps:
You clone the project repository (the project's web page – Browse code repository).
git clone [email protected]:project/paragraph_view_mode.gitYou go to the branch where the error has been found, e.g.
git checkout 8.x-1.xAfter introducing the necessary changes, you have various options for generating a patch. If there were not too many changes and you did not need to commit them, just generate a patch based on the differences that have occurred:
git diff > [project]-[description]-[issue-number]-[comment-number].patch
However, if there were more changes then – depending on what you want to achieve – you can generate a patch specifying: the range of commits, the individual commit hashes, the number of commits for a given commit hash, e.g.
git format-patch -<n> <SHA1>
--std-out > [project]-[description]-[issue-number]-[comment-number].patch
As you have surely noticed in the examples above, the patch name follows a specific naming convention. Most often, you give such a file with the project's name, a short description, the issue number, and also the comment number in which the patch will be issued.
Sometimes, in addition to the patch itself, it is necessary to attach an interdiff, i.e. a file showing differences between your patch and, e.g. a previously reported patch, on the basis of which you have introduced specific changes. You can find more about this topic in the article "Creating an interdiff"
3. Security Advisory Policy
At some stage of the project development, you can finally say that it is stable and secure enough to apply for SAP (Security Advisory Policy). It is a system of open and public information on the incidents within the Drupal's core and on contrib projects. The detected incidents are kept secret (if possible) until the creation of a release with an appropriate security patch with the support of the Drupal Security Team.
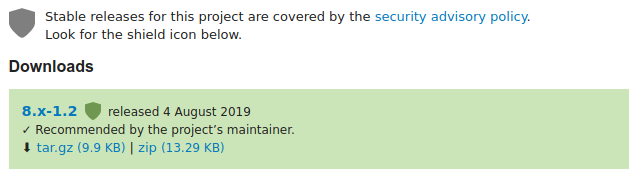
The projects covered by SAP receive a shield icon on the project's web page and green background for all stable releases.
This makes them stand out on the web page while increasing the value of these projects in the eyes of potential users.
3.1 How to apply?
- Create a new issue on the web page https://www.drupal.org/project/issues/projectapplications.
- Define the title in accordance with the scheme [CORE VERSION] [module name], e.g. [D8] Autotile.
- Set the issue status to "Needs review".
3.2 What requirements does your project have to meet?
- It has to meet the goal functionalities found in the project's description.
- it has to successfully pass PAReview – tool for online verification of Drupal projects.
- It has to be approved by the community (it is mainly a verification of the code's quality and security).
The verification process is one-off for a given portal user. After obtaining the approval, the user can create any number of projects covered by SAP, without having to undergo the verification process.
Summary
As you have surely noticed, there are several ways to contribute to the Drupal community. You can both support the existing ones, as well as develop your own projects, contributing to the development of open software. A well-made module can be used by you and many other users many times over in many projects.
I think that for us, as programmers, it is a kind of a mission or a form of paying back the community for the ability of using free software for our own use. Of course, it is also a great way to exchange knowledge, experience, and self-promotion. It is worth to mention that this way you can promote not only yourself, but also the organisation/company for which you work, or even the clients for whom you create given functionalities. I already develop projects at the Drupal.org web portal. You can do it also. Start today!