
What is Two Factor Authentication and How to Use It in Drupal?

Two factor authentication (2FA) is an increasingly popular functionality on websites, and this article will teach you how to completely implement it on a Drupal 9 or 8 site.
What is two factor authentication?
Two-step authentication is the process of authenticating the user at login, consisting of two verification methods. The first method refers to the well-known login by entering login and password. Along with web development and many services storing sensitive data, such as Facebook or GitHub, the risk of attacks and the possibility that someone unauthorised gains access to your account has increased. To prevent such a situation, the second method of authentication has been introduced. The solution doesn’t guarantee 100% certainty that your data is safe, but it greatly improves data security, for instance, in Drupal.
The most popular methods of the second authentication at login include:
- a code sent by SMS message,
- a list of generated codes to be used,
- generation of access codes in external applications such as Google Authenticator.
Implementation of two factor authentication in Drupal
Implementing the basic version of this functionality comes down to installing several modules and their configuration.
The basic version includes:
- changing the login process in Drupal,
- new block with a login form,
- generation of text access codes.
The extended issues that we’ll describe in this article will concern the generation of codes in the Google Authenticator application and codes sent to an email address.
Modules
To build the two factor authentication presented in this article, you'll need the following modules:
- Two-factor Authentication (TFA) - main functionality,
- Key - Drupal module for managing keys,
- Encrypt - allows other modules to encrypt and decrypt data,
- Real AES or other module adding an encryption method (a list of these modules is listed on the site of the Encrypt module),
- GA_login - integration with Google Authenticator, a mobile application that generates codes.
Installation
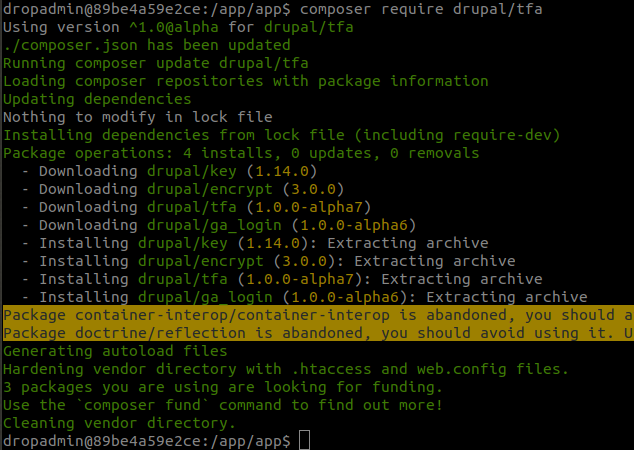
The fastest way to install all the modules you need is to use Composer and execute the shell command:
composer require drupal/tfa
and
composer require drupal/real_aes
If you aren’t using Composer, download each of these modules and unzip them in the directory where the site is hosted - /modules/contrib. If you don’t have a contrib directory, you’ll need to create one.
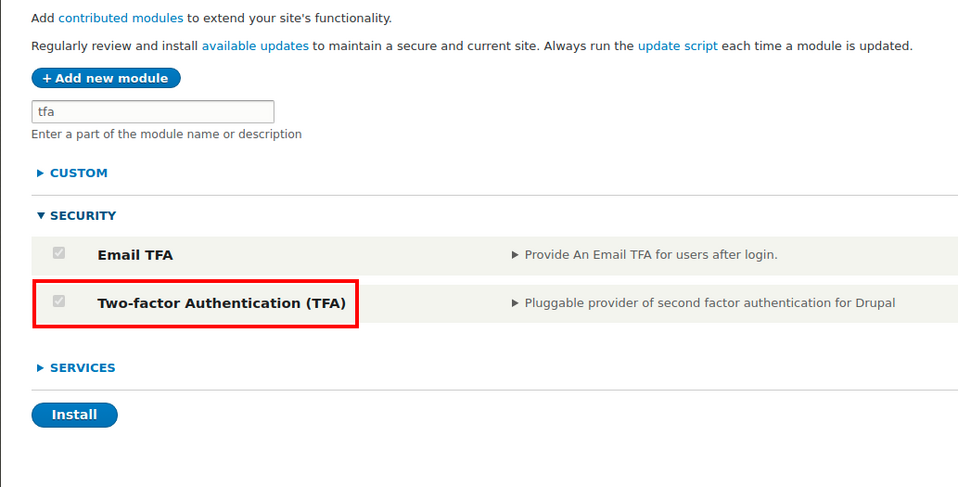
Now enable all modules.
Drush: drush en key real_aes encrypt tfa ga_login
Or conventionally on the site /admin/modules
Login process after installation of Two-Factor Authentication (TFA) module
- The user enters their login data (login and password) into the form and confirms them.
- If the data are correct, Drupal creates a user session, identifying the user as authenticated.
- TFA module implements hook_user_login.
- TFA verifies whether the logged-in user should use the second authentication method. If yes, the user is logged out and redirected to the second authentication method.
- The authentication process follows, e.g., by entering a code from an SMS message.
- If the code is correct, the user is logged in again.
Configuration of modules
The first step is to create a key for encryption. For this purpose, proceed to the Key module configuration and add a new key.
/admin/config/system/keys/add
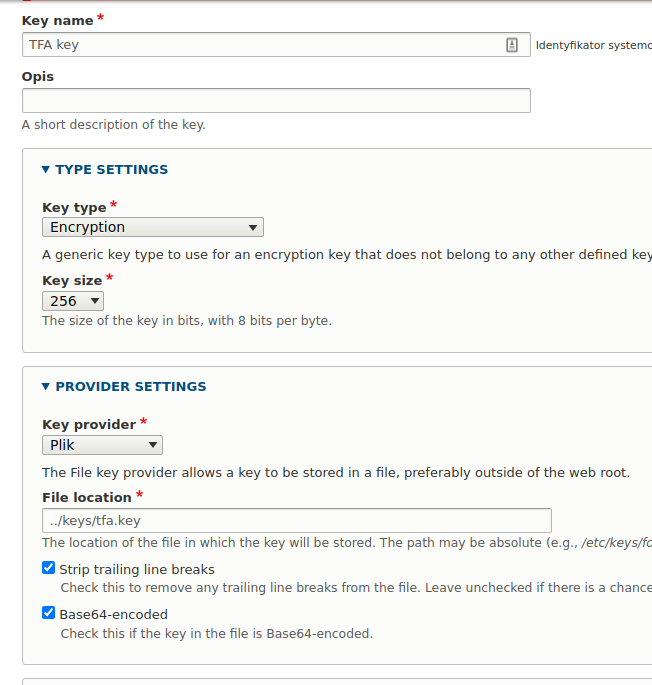
Give the key a name. Select Encryption as the key type and set the Key size to 256 bits.
In the settings, where the key is taken from, there are three options to choose from. However, for security reasons, I recommend choosing to keep the key in a file outside the website's main directory or as an environment variable (env).
For a file in File location, you need to specify the path where the file is located. It must already exist because otherwise, you won’t be able to save any changes. See below how to generate such a file.
File path
../keys/tfa.key
Where .. (two dots) means that you are leaving the current directory to go up higher.
A third option, which isn’t recommended, is to keep the key in the configuration files. In this case, you have to be careful because they are in the directory where the site is hosted. They might also be sent to the repository by mistake.
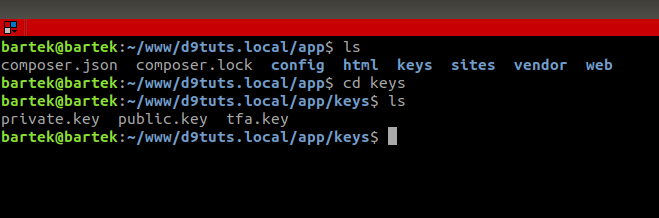
You can see an example of a directory structure presenting the keys' location in the screenshot below.
- Web - directory with Drupal,
- keys - directory with keys,
- tfa.key - file with keys.
How to generate a 256-bit key?
The easiest way to do this is with the Linux command:
openssl rand -base64 32 > tfa.key
or
dd if=/dev/urandom of=keyfile bs=32 count=1 > tfa.key
In both cases, the result will be creating a tfa.key file with the generated key.
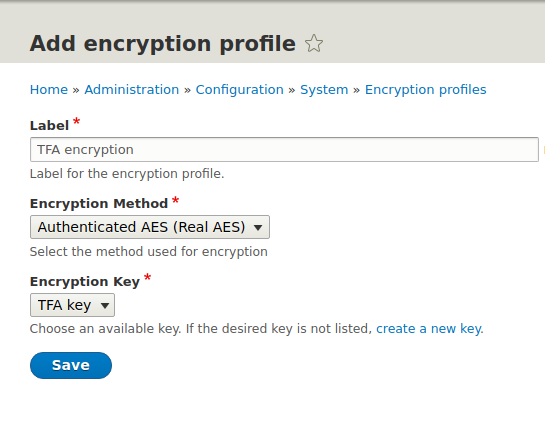
After saving the changes, you proceed to the configuration of the Encrypt module, where you’ll need to add an encryption profile.
/admin/config/system/encryption/profiles
Configuration is simple, limited to selecting the encryption method, in this case, provided by the Real AES module, and choosing the key you have just generated.
After these operations, you can proceed to the configuration of the TFA module, which can be found at the site
/admin/config/people/tfa
From here, you manage the entire functionality. You enable and disable 2FA (two factor authentication) for our site, by default, 2FA is disabled. We also select the roles for which 2FA will be required. It’s important that on the site with permissions, the selected role has access to 2FA configuration.

Two factor authentication plugins
After installing the modules mentioned above, we have three plugins to choose from. Two of them are based on the Google Authenticator application.
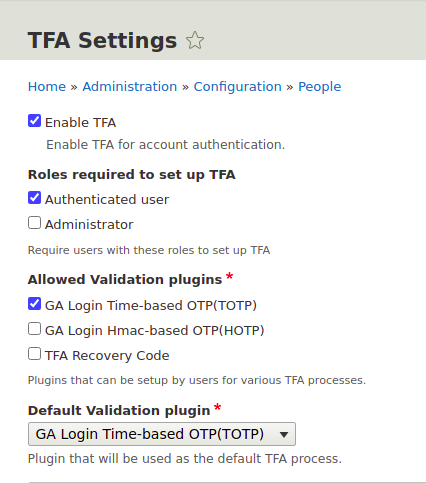
- Time-based OTP - the application generates time codes that allow you to log in to the site.
- Hmac-based OTP - a hash key is generated, and the user can log in if there is a match.
The third plugin is available directly from the Two-factor Authentication module.
- TFA Recovery codes - generates a set number of codes for the user to use when logging in.
We can create our own plugins (we’ll mention this later in the article) and introduce new ways of authentication, e.g., via SMS codes.
In the settings, you can also specify how many times a user can skip enabling 2FA. The default is 3 logins. After logging in, the following message will appear.

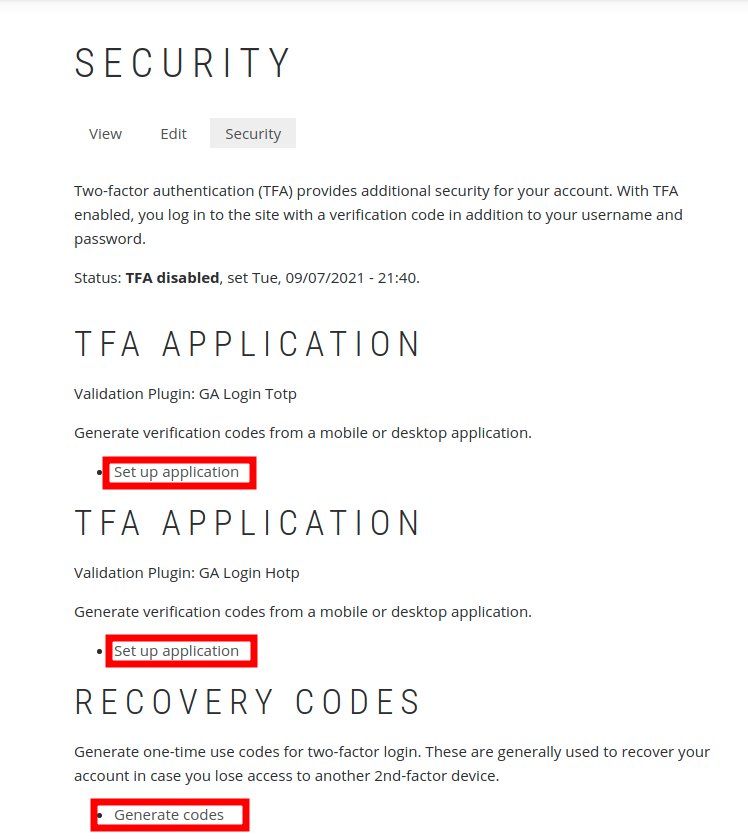
If the permissions for the role are set correctly, the Security tab will appear on the profile site with the option to configure each of the authentication methods enabled.
Address: /user/UID/security/tfa
To enable two factor authentication, you only need to configure one method. If more than one method is configured, the user will be able to choose which method to use when logging in, and the user won’t have to go through authentication using each method.
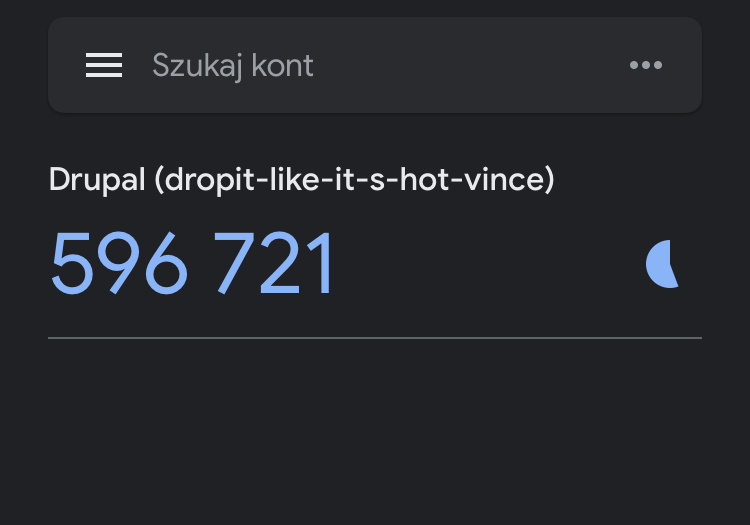
We enable the TOTP and HOTP plugins via the mobile app of our choice, namely:
- Google Authenticator (Android/iPhone/BlackBerry),
- Authy (only TOTP),
- FreeOTP (Android),
- GAuth Authenticator (desktop).
You also need to scan a generated QR code in the application.
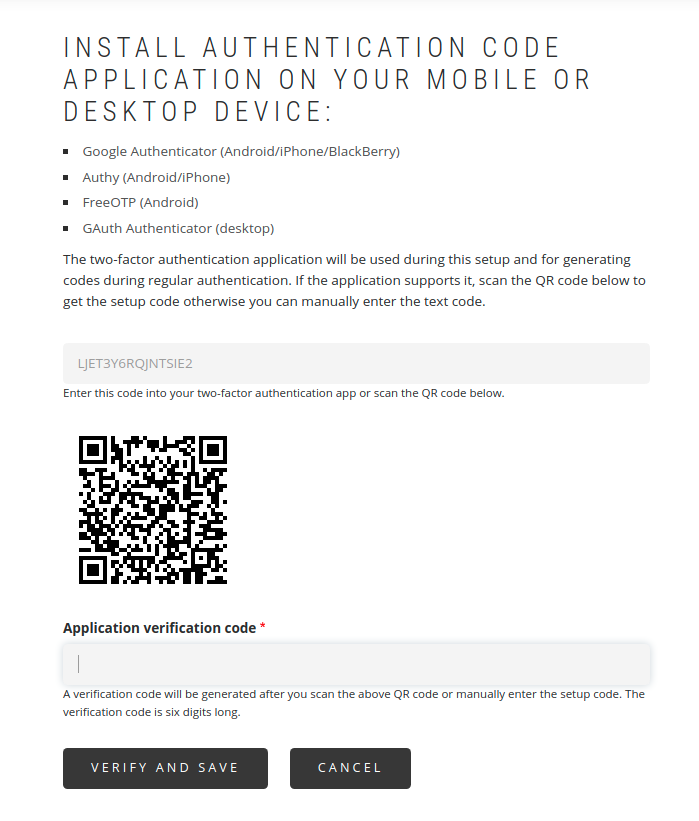
After this operation, codes will be generated in the mobile application. Now, generate the first code and confirm it. If it’s correct, the selected method will be enabled.
For Recovery Codes, simply generate and save the codes in a safe place.
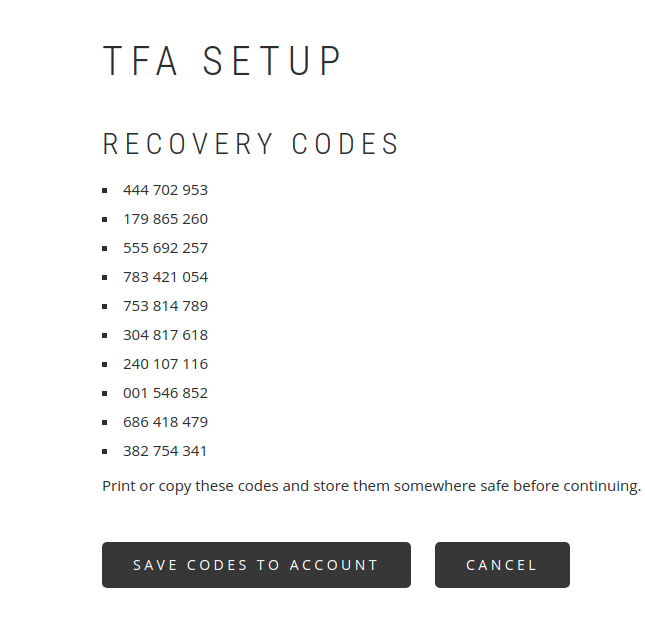
This method will be enabled by generating the codes and assigning them to the user's account - the Save codes to account button.
Your own authentication plugin
The TFA module gives you the ability to add your own two factor authentication plugins. This consists in creating appropriate classes with methods.
How else can you authenticate a user who is logging in? You can send the code by SMS, email (there is a ready-made TFA Email module for this) or on Slack.
The whole code presented below isn’t a ready-made plugin but only a description of what it’s built of.
It’s easy to map your own module based on the code from the ga_login module. I recommend reviewing and analyzing it for better understanding.
Let us assume that our module is called tfa_code. The two main classes should be located in the following directories.
TfaCodeValidation Class (name can be freely given)
tfa_code/src/Plugin/TfaValidation/TfaCodeValidation.php
TfaCodeSetup Class (name can be freely given)
tfa_code/src/Plugin/TfaValidation/TfaCodeSetup.php
The TfaCodeSetup class is used to handle the process of enabling a given authentication method, and the TfaCodeValidation class is responsible for the process of authenticating the user at login using the selected method.
TfaCodeSetup class and its main elements
The annotation in the class comment contains information that this is the TfaSetup plugin and has a unique id that will be used in the other class.
/**
* Setup for 2FA by SENDING code.
*
* @TfaSetup(
*   id = "tfa_code_setup",
*   label = @Translation("TFA Code Setup"),
*   description = @Translation("TFA Code Setup Plugin"),
*   setupMessages = {
*    "saved" = @Translation("code saved."),
*    "skipped" = @Translation("code not saved.")
*   }
* )
*/
class TfaCodeSetup extends TfaCodeValidation implements TfaSetupInterface {
The class inherits from the validation class and implements the interface contained in the TFA module.
Method
public function ready() {
It returns TRUE if the authentication method can be enabled in the given context. When can it, on the other hand, return FALSE? For example, if you implement the sending of codes via SMS, users must first confirm their phone number in their profile. If the user doesn’t confirm their phone number beforehand, they can’t enable this authentication method. The ready() method should then be written in such a way that it returns FALSE.
Method
public function getOverview(array $params) {
Displays information and links about how to enable the authentication method.
Method
public function getSetupForm(array $form, FormStateInterface $form_state, $reset = 0) {
Contains the definition of the form for enabling the given method. It’s here that the requirements to enable the plugin must be included, such as a box of the form to enter the code that will come to the person who wants to enable this authentication method.
Example:
$form['get_code'] = [
 '#type' => 'button',
 '#value' => t('Get validation code),
 '#ajax' => [
   'callback' => [$this, 'get'],
   'event' => 'click',
 ],
 '#limit_validation_errors' => [],
 '#prefix' => '<div id="tfa-validate-set-code">',
 '#suffix' => '</div>',
];
A button that activates the get function, defined in the callback.
In the get function, you have to program the sending of the code to the user, e.g., via email or SMS. The name of the function may be freely given here.
Box for entering the sent code
$form['tfa_container']['set_tfa_code'] = [
 '#type' => 'textfield',
 '#size' => 30,
 '#placeholder' => t('Type validation code here'),
 '#prefix' => '<div id="tfa-validate-set-code">',
 '#suffix' => '</div>',
];
The fact whether the codes match - the one sent with the one entered - is verified in this method
public function validateSetupForm(array $form, FormStateInterface $form_state) {
If everything is correct, the method
public function submitSetupForm(array $form, FormStateInterface $form_state) {
returns TRUE.
TfaCodeValidation class and its main elements
The class annotation is analogous to that of TfaCodeSetup.
/**
* Code validation class.
*
* @TfaValidation(
*   id = "tfa_code_validation",
*   label = @Translation("TFA Code validation"),
*   description = @Translation("TFA Code Validation Plugin"),
*   setupPluginId = "tfa_code_setup",
* )
*/
Method
public function ready() {
Looks analogous to the previous class.
Method
public function getForm(array $form, FormStateInterface $form_state) {
It is here that the form for the method is created. The user sees the form when logging in and authenticating. As in the previous class, there should be boxes for sending and entering the code. The code is verified in the method
public function validateForm(array $form, FormStateInterface $form_state) {
This concludes the implementation of our own two-factor authentication plugin. Once again, I recommend analyzing the code from the ga_login module, as you will quickly create your own working module based on it.
Two factor authentication in Drupal - summary
With this extended article, we wanted to explain the implementation of two factor authentication for a Drupal website as best as possible. Nowadays, more and more Internet users are aware of the risks and loss of data. Enabling 2FA makes their accounts on websites more secure and harder to intercept. Two factor authentication isn’t a 100% guarantee, but it certainly significantly increases both security and the level of trust for the site on which this functionality is implemented. Our Drupal support team can help you implement it and provide more advice on the security of your site.